Showing posts with label Dylusions. Show all posts

Power of Thought with Tamiko

Sunday, September 21, 2014

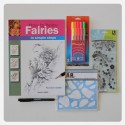
Happy Sunday to you! Tamiko here with the Moonlit Dreams Kit! Before I begin I feel obligated to let you know that this kit is quickly selling out and there are only a few left! When it's gone.. It will be GONE!  Take a moment to grab a kit today for yourself and/or another fairy enthusiast! ::smile::

If you have the book, she's on page six.. ::giggles::

I chose her, because she looks like a fairy with a little bit of an edge! She is confident. She knows her value. The POWER of THOUGHT the Magic of the Mind. If you think it and believe it,  you will.. and it shall be.  Do you BELIEVE in fairies?  Do you believe that you CAN draw anything you try?   Well this fairy does.. and it shows..


I used my large Dylusions Creative journal. I really like that book.  The pages withstand all kinds of medium.  The cover is kraft and it allows you freely personalize your cover as it just a blank canvas itself.  Inside the front page contains a pocket where you could keep a few of your favorite art journaling items close by.  Anyway.. I really like it! (said that already, then it must be true)
I drew my image in pencil. Then went over it with a permanent pen, the Faber Castell Big Brush Pitt Pen, which is currently available in the September kit, We Are Family!  I added a little water to my gesso, so I could still see my image through the gesso and applied the acrylic paints.  Then I found a quote fitting for the page.  Hope you enjoyed it and thanks for stopping by.


12 Comments »

Believe with Tamiko!

Thursday, July 24, 2014

Hey hey GOOD PEOPLE!!  It's Tamiko!!

To BELIEVE

Is to have .. a faith.. almost a knowledge, with or without any real proof.. that something is true.  I believe in fairies.  (smile)  I believe in their magical essence.  I think they are around us all the time, specifically, when I create.  When I play, I think fairies sit with me and push me to practice, practice, practice!  Who cares if you use the minimal supplies, as long as you use them?  Nothing beats a failure but a try, can we agree?

Any who.. let's get to what I want to show you today!!  It's from page twenty-five of your book, if you are following along with us!  This page was a little bit more difficult to do.. Of course my picture does not look like the page, because I drew it.  I am not the artist of the book.  ::giggles::   I took a lot of the same characteristics and the steps and from the page.

Oh and  I totally enjoyed using the FUDE BALL pen by Ranger that comes in the kit.  Although thicker that many roller ball pens, not nearly as fragile as I thought it might be!  It practically glided over the Dylusion inks and then layers of acrylic paints I used from the Deco Art Mixed Media Fluid line.  Here's my page..  and a few additional close ups...


The word *Believe* I did with a paint pen then I outlined with my Fude Ball pen, something I picked up reading the The Art of Whimsical Lettering, by Joanne Sharpe.  You can find that at Frosted Designs!  This allowed me to branch out and believing not only in my own ability to learn to draw fairies, but also my own handwriting. (smile)  Also added some accent white gel pen markings with my favorite gel pen, the Unibal Signo.  Note:  This has to be used on a completely dry page or you could possibly ruin your pen.  If you accidentally use it on a damp page, wipe off the pen nib immediately!

Again.. if you have the kit/book.. I would love to see what you are doing with the fairy pages!  If you don't want to share publicly.. Feel free to private message me a sneaky peek on Facebook!

 Oh, and thank you if you have purchased the kit or plan to soon!!  Sandee Setliff and I (Tamiko McCurry) are both available to you for any questions you may have about the kit. (smile)

Thank you for stopping by!!


12 Comments »

Katie is Taking the Scenic Route!

Saturday, June 14, 2014

Happy Saturday everyone! I hope you are enjoying your summer thus far. I know I have really enjoyed the warmer weather and I am trying to get outside as much as possible! Here in the Pacific Northwest we have to grab the sunshine while we can!

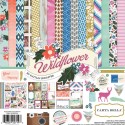
My layout today is using the Carte Bella Wildflower collection that is ON SALE right now in the Frosted Designs store. I have used just about every last scrap of this collection and I keep coming back to it! You can get the ENTIRE collection including 12 12x12 double sided papers and matching cardstock sticker sheet for only $11.24!!!! This is a steal, especially considering that the quality of this paper is super thick and it can take alot of ink! As you will see in my layout today.


I started with some light gold cardstock as my base and then started building my layers. I actually used some packaging from some Prima stuff to be the base layer. Over that I put several of the different patterned papers, distressed them first, then added the sentiment block which I also distressed and inked. After those were laid down I went over with my Lindy's Stamp gang starburst spray in Tiffanylou Blu using a mask, I used both sides and smudged with my finger to make sure I didn't waste any ink. I went over that a second time with the same mask in a few spots using the Dylusions Spray in white linen. My all time favorite!! It really makes the sparkle of the Lindys stand out because it's such a contrast.


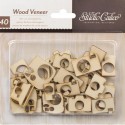
I laid down my pictures, some fussy cut elements from more of the paper, wood veneers, and had fun embellishing. 


It was alot of fun putting this together and I highly suggest buying this collection before it sells out! It's such a great deal and is perfect for those outdoor photos!! I hope you enjoyed my layout today! Stay tuned for more awesome inspiration from our team tomorrow!!! 


3 Comments »

Lookin' Suave!!

Monday, March 17, 2014

Hello, Joni Parker here today wishing you a Happy St. Patrick's Day if you celebrate that and a Happy Monday if you don't.

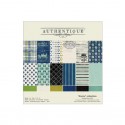
Today I wanted to share a few layouts that I created using the Authentique Suave collection that we have in the Frosted Designs store.


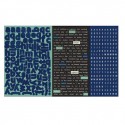
I really loved the woodgrain on this paper and knew I had the perfect photo to match!!  The paper has a cute little mustached man in the corner that I didn't want to use, so I covered it up with a banner and a wood tag that I inked/distressed.   I added some of the stickers from the collection, along with some Sugar Dots and UmWow Chipboard as accents.


On this one, I was inspired by the little card that says "This is what Handsome Looks Like"!!  I easily found a handsome photo of my son to use for this one!!  Then I cut other pieces of patterned paper to approximately the same size as the title card and rounded the corners and layered them to the right of the photo.  A few sticker accents and a white pen border to finish up a cute and simple layout.


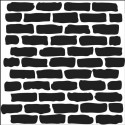
For this one, I liked the "Rock and Roll" sticker and the "Like Father, Like Son" sticker, so I found this photo of my husband and son in California posing for me at the Pacific Ocean.  I realized after I had the photo and papers attached that it needed something for the background....so, I decided on the brick look using a mask.  So my trick for this after I've attached the photo is to use that "extra 4x6" photo that comes in your photo packs...you know the one that is advertising something (or I've used a photo out of my pack that I KNOW I'm not going to scrap).  Anyway, lay that over the "real" photo and you have a perfect cover-up so you don't accidently get ink on your photo.  For the bricks, I just used a stiff stippling brush and dabbed it on an ink pad and then dabbed it into the mask for a nice soft effect.  I also added Sugar Dots and UmWow Chipboard and a Maya Road clip to this layout for a few fun accents.


For this one, I started with my photos...2 pictures of my son sliding down a sand dune at the beach.  I kept the photos together vertically since one of the photos is kinda hard to tell what he's doing...the other photo helps to understand what's happening without having to work to figure it out (or at least that was my goal..lol!).  I added mists to the background and found a couple of fun stickers that worked with my theme.


A fun thing to note about this collection is that I never used Alphas from my stash for any of these layouts.  The set comes with 3 different alphas and I found that they all worked perfectly for my layouts.   Also, I only  pulled cardstock from my stash to mat one photo...these patterns were so useable and perfect and the solid colors were so perfect I didn't need to add any solid cardstock.  I did pull embellishments from my stash though, as I mentioned in each layout description.  I wanted to mention that though since Alphas, Cardstock and Embellishments are typically things I add from my stash, and realized that I really didn't need to do that this time since the papers the alphas are so perfect!!!


4 Comments »

Dylusion Fun with Deena!

Saturday, September 28, 2013


Like all scrapbookers, card markers or mixed media artists I am addicted to supplies and what better way to have up to date and a variety of products at my finger tips than belonging to the Frosted Designs Design Team.
Before I share with you a layout I created using products from the store let me share with you a little bit about myself. I am a stay at home mother of 2 who likes to spend as much time as I can creating, getting messy and exploring new products and techniques.

Butterflies, tulips, peacocks and the smell of rain are a few of my favourite things. I supose I should add my husband and 2 children to this list. My favourite colours would have to be purple, pink, aqua and grey. Things that I dislike are spiders, brussel sprouts, onion and the smell and taste of mangoes (yuck).

My favourite products to use at the moment would have to be the Dylusion Inks. It means getting messy and running around with ink staining my hands for a couple of days afterwards but I don't mind, that is the enjoyment of creating.

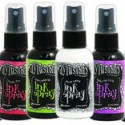
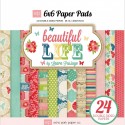
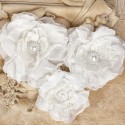
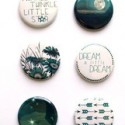
In this layout I have used 6x6 Echo Park Beautiful Life Paper Pad, Heidi Swap Stencil - Butterflies, Prima Flowers - Paquita, Um Wow - Dream A Little Dream Flairs and Dylusion Inks Sprays - Funky Fuscia and Calypso Teal and American Crafts Cardstock - White

I love the effect of spraying two or more inks over the top of each other (in this case only 2) and the effects you get when laying the stencil over the top and lightly spraying with water. I also coloured the little aqua roses with dylusions and water.

 A close up of the gorgeous Prima flower, they have so much texture.

It was easy to add a title to my layout with the UmWow flair. My daughter is a dreamer at times and this flair was just perfect.

Would love for you to come visit me at http://deezignerpapercraft.blogspot.com.au/

Happy Creating


Follow on Bloglovin

2 Comments »