Showing posts with label Crafters Workshop. Show all posts

Inspired with Shanna!

Monday, August 4, 2014

Hello everyone. My name is Shanna and today is my first independent post for Frosted Designs.

I am so excited and happy to be on the team here and sharing my passion for crafting and creating with you all.

Since the new team has joined each of us has shared a few fun facts and a little info on who we are.
So here is a little bit about me.

1. I am a SAHM of two and I spend my free time crafting. I love all styles of crafting and enjoy the creative freedom of it.

2. My favorite color is teal, aqua, turquoise, or any shade of that! 

3. I love all things ocean themed and steampunk themed! 

4. My favorite type of project is altered items, but I also love ATC's, and cards, and tags....Who am I kidding. I love it all!


Today I am sharing with you a tag I made. I really enjoy mixed media!


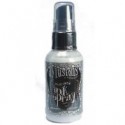
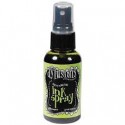
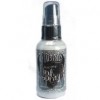
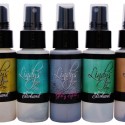
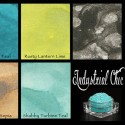
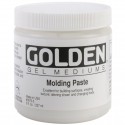
First I covered the tag with the Rusty Lantern Lime spray. Then I used the Time Travel Teal with a stencil. Then I used the Shabby Turbine Teal Magical with the paste and again with the same stencil.


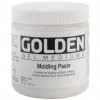
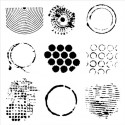
I also used the Steel Shimmer with paste with The Crafters Workshop Well Rounded to add more texture. I topped off the feathers with some glass bead gel and finished the tag off with some Prima Flowers and Prima stitching stamping.


Thank you so much for stopping by today and I hope you were mixed media inspired. There is tons of amazing products in the store. Below are just a few that I used.


5 Comments »

Lookin' Suave!!

Monday, March 17, 2014

Hello, Joni Parker here today wishing you a Happy St. Patrick's Day if you celebrate that and a Happy Monday if you don't.

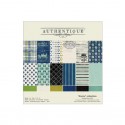
Today I wanted to share a few layouts that I created using the Authentique Suave collection that we have in the Frosted Designs store.


I really loved the woodgrain on this paper and knew I had the perfect photo to match!!  The paper has a cute little mustached man in the corner that I didn't want to use, so I covered it up with a banner and a wood tag that I inked/distressed.   I added some of the stickers from the collection, along with some Sugar Dots and UmWow Chipboard as accents.


On this one, I was inspired by the little card that says "This is what Handsome Looks Like"!!  I easily found a handsome photo of my son to use for this one!!  Then I cut other pieces of patterned paper to approximately the same size as the title card and rounded the corners and layered them to the right of the photo.  A few sticker accents and a white pen border to finish up a cute and simple layout.


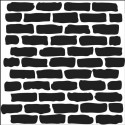
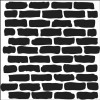
For this one, I liked the "Rock and Roll" sticker and the "Like Father, Like Son" sticker, so I found this photo of my husband and son in California posing for me at the Pacific Ocean.  I realized after I had the photo and papers attached that it needed something for the background....so, I decided on the brick look using a mask.  So my trick for this after I've attached the photo is to use that "extra 4x6" photo that comes in your photo packs...you know the one that is advertising something (or I've used a photo out of my pack that I KNOW I'm not going to scrap).  Anyway, lay that over the "real" photo and you have a perfect cover-up so you don't accidently get ink on your photo.  For the bricks, I just used a stiff stippling brush and dabbed it on an ink pad and then dabbed it into the mask for a nice soft effect.  I also added Sugar Dots and UmWow Chipboard and a Maya Road clip to this layout for a few fun accents.


For this one, I started with my photos...2 pictures of my son sliding down a sand dune at the beach.  I kept the photos together vertically since one of the photos is kinda hard to tell what he's doing...the other photo helps to understand what's happening without having to work to figure it out (or at least that was my goal..lol!).  I added mists to the background and found a couple of fun stickers that worked with my theme.


A fun thing to note about this collection is that I never used Alphas from my stash for any of these layouts.  The set comes with 3 different alphas and I found that they all worked perfectly for my layouts.   Also, I only  pulled cardstock from my stash to mat one photo...these patterns were so useable and perfect and the solid colors were so perfect I didn't need to add any solid cardstock.  I did pull embellishments from my stash though, as I mentioned in each layout description.  I wanted to mention that though since Alphas, Cardstock and Embellishments are typically things I add from my stash, and realized that I really didn't need to do that this time since the papers the alphas are so perfect!!!



4 Comments »

Merry Christmas Eve!

Tuesday, December 24, 2013


My final project for 2013 with Frosted Designs. 2014 brings some exciting developments, so I hope you come back to see more of my work for Frosted Designs in the future!!!
I decided to use more of my gorgeous Prima Holiday Jubilee collection, seeing as it is Christmas Eve!


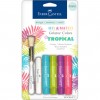
Here you can see where I've used the gorgeous Prima and Petaloo flowers in the shop! I used the Crafter's Workshop Brick mask with Walnut Stain Distress Ink and stamped with Tropical Gelato in "Snow Cone".


I have lots of layers of the Holiday Jubilee Papers and used some of the Wood Stickers from the collection. I added some pine cones and burlap ribbon from my stash as well, as well as a lovely chipboard stocking from Molossi.


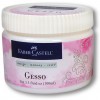
I used gesso to distress and age some of the papers and for a cool effect around my photo. Here you can see the harlequin and script stamps from Visible Image as well. I added some twine from my stash here to focus on my daughter Aine!


I journaled a little on this layer to talk about some of our favorite Christmas traditions.
Thank you so much for stopping by!

2 Comments »

Nice and Bundled Up with Cathi!

Monday, December 23, 2013

I had so much fun with the Prima Holiday Jubilee line, I decided to share an extra layout with you this month! 


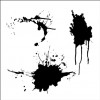
I had such fun creating this! I used the aqua and brown papers from my Christmas Prima Holiday Jubilee papers to make a nice a snowy layout! I added in some wood stickers and a flair from the collection as well. My snowflakes were punched from a Martha Stewart punch and covered in silver stickles! I used a Paint Splat mask from Crafters Workshop to make my snowy icicles using modeling paste.


I added a rosette with a snowflake center as part of my flower cluster, tucking in some drywall tape grids for some fun texture around the layout.


To add a little bit of a snowy feeling I sprayed some White Linen Dylusions mist around the edges of the layout. There are so many yummy things in the store, come check it out!!!


2 Comments »