Showing posts with label Prima. Show all posts

The Deconstructed Layout with Anita!

Monday, August 25, 2014


Hi everyone, it's Anita here today to share another Deconstructed Layout with you.

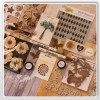
I am so loving the Capture The Moment Kit from Frosted Designs- I have made several layouts with it now and every single one looks different! Be sure to get one while they last. 


Today I want to talk about using a LOT of the same color, without overwhelming your layout with it. 
You CAN do it!
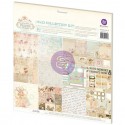
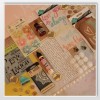
Here is a look at my layout. Of course, I had to have some pink on it. I used Prima papers from the Capture The Moment kit, and Princess Collection Kit.
This is my second layer from the bottom, and I love the pattern, but wanted more color. So after I punched the edges, I inked it- and I mean I really inked it! The ink extends about 2- 2.5" in from the edge. 
I started with the lightest color of ink I wanted to use, then added a darker color of ink
 just along the edge of the paper.
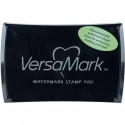
Next up, I used my VersaMark  around one side at a time, and added a bit of texture with Lindy's Stamp Gang Hibiscus Rose Orange Embossing Powder.
I also used Lindy's on my Blue Fern Studio's Chippie- this time Golden Angel Wings. You can see on the upper layer of paper, just under the chipboard, I stamped using the Heart Flourish Splash stamp and an ink one shade darker.  I added the small burlap flowers to the centers of a couple of larger flowers for the corners.
 I added more flowers, butterfly and brad, all included in the Capture the Moments kit, to the lower corner.
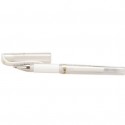
I also added some faux stitching with my Signo White pen.
This photo illustrates how I wanted to use my color how it all came together. For the most part my layout is a monotone, mainly PINK. However, I separated each layer of pink with a NEUTRAL. Starting from the corner there is;
1. The background page
2. the PINK punched page
3. the neutral flower die-cut and chipboard
4. the PINK edge of the punched paper
5. the white portion of the punched paper
6. the PINK cardstock
7. the photo
So, the moral of our story is this:
if you want to use one color in abundance, be sure to place it between layers of neutral colors
and it will be fabulous!
I hope you give this a try, and I would love to see how it turns out!


4 Comments »
Summer Time Beach Totes with Prima's Seashore Collection!!!

Tuesday, June 24, 2014

Hello there crafters!!  It's Brandi here popping in to share some projects I recently made using the fabulous Prima Seashore Collection in store!!

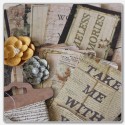
Summer is in full swing here in the Sunshine State which means warm HOT weather, tons of sun, and weekend trips to the beach!!  And what better way to celebrate summer than with these fabulous beach totes?!?


Aren't they adorable?!?  I used my Cricut Explore machine and some purse SVG's from SVG Cuts to cut everything out! 


Then I scored and inked all the appropriate edges and started putting it all together :-)


I added several chipboard pieces from the coordinating chipboard pack, inking all the edges along the way :-)  I also used some of the Petaloo flowers (which match this collection PERFECTLY!!) in store to add some detail!


I finished the bags with some hemp cord, and the large tote with some lace form my stash!


Easy peasy, right?!?  And perfect for this time of year :-)


Well gang...  Thanks so much for stopping in and have a LUCKY day :-)


Products used from the Frosted Designs Store:
Want to save 20% on Prima Products? Use the Code PRIMA at checkout. Offer expires 6/27/14


6 Comments »
Prima Princess Spring Bouquet!!!

Saturday, May 24, 2014

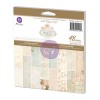
Hey there crafty neighbors!!! I'm popping by the blog today to share a fabulous Spring Bouquet I recently made using the beautiful Prima Princess Collection in store!!!

Here's a look at this project:


I knew when I saw this collection exactly what I wanted to do with it!!!  I used my Cricut Explore and Giant Flowers cartridge to make all t he necessary cuts!  There are several other ways to make handmade flowers though!  You can use heart punches or dies, flower punches or dies, or even cut out the petals by hand and attach them to create large, beautiful flowers!

I started by cutting out all the petals in random papers from the 6x6 paper pad, then inked the edges with the "Knotted Wood" ink included in this month's kit!  I rolled the edges over various size paint brushes for a more "natural" look:


Here's a look at all three complete finished:


After I finished the top parts, I hot glued some long lollipop sticks to the base in bundles of three for dimension.  Then I grabbed coordinating ribbon colors and wrapped the base of each:


I finished all of them with a small bow!


After my flowers were complete, I started on my "vase" (altered mason jar!).


I used the wood icons included in last month's "Beauty of Nature" kit as well as a large Prima flower from the store!  I colored my flower with Lindy's Starburst Pearls mist and inked it with the "Knotted Wood" ink.  I wrapped some tinted rose ribbon around the jar and a small strand of pearls.


Once everything was all said and done, I added the flowers inside the jar and finished it off with a little hemp cord!!!


Well gang...  Thanks so much for stopping in and have a LUCKY day :-)


Products from the Frosted Designs Store:

6 Comments »
Live Well, Laugh Often, and Love Much!!!

Thursday, May 8, 2014

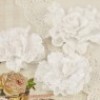
Hello to all my crafty friends out there!!!  Just stopping by the blog today to share a Mother's Day card I made using the new Prima Princess collection in store now!!!
I fell in love with the "Live, Love, Laugh" stencil included in this month's kit and decided to carry that theme out across several projects!  Here's a look at a finished card I made for my Stepmom:


These papers (like all Prima papers) are very soft, and always beautiful!!!  They are truly perfect for creating keepsakes for all the special women in your life :-)
I started with one of the 6x6 papers to use as my card base, then distressed and inked the edges with the Prima ink included in this month's kit!  I cut up various papers from the pad, distressing and inking them along the way and layered them up!

The resist canvas borders are absolutely fabulous and work with any project!  I went over it with the same brown ink and added it atop of all the layered papers.  


 I also used the Viva Paper Pen in this month's kit to add accents around my sentiment!


I used the chipboard pieces from the "Beauty of Nature" kit and added a coat of gesso on top.


I finished the card with a burlap flower from last month's kit, some burlap, and a butterfly from my stash!


See how easy that was?!?  Now... Only a handful more to make and I'll be done!!!  Hahaha!!! 
Well gang...  Thanks so much for stopping in and have a LUCKY day :-)

7 Comments »