Showing posts with label The Deconstructed Layout. Show all posts

The Deconstructed Layout with Anita!

Wednesday, October 22, 2014

Hi everyone, it's Anita here today and I have another
Deconstructed Layout to share with you today.
I am using some wonderful papers and supplies from
for my project. Be sure to check the store for the latest items and sales! Today my project is about making your own background.

Here is a look at my project
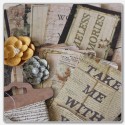
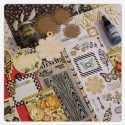
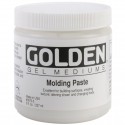
 I started with a plain piece of cardstock and used stencils, Gelatos®, watercolor and pastel pencils, molding paste, stamps, and spray inks to alter it. 


If you would like to see more of The Deconstructed Layouts
the entire series is shown HERE.


2 Comments »

The Deconstructed Layout with Anita!

Wednesday, October 8, 2014

Hi everyone, it's Anita here today to share a new Deconstructed Layout with you. 

For my project I am using items from the Capture The Moment kit and 
the Summer's End Kit, available in the Frosted Designs Store.

Today's tutorial is on paper pleating, which is a great way to add some
dimension and texture to your layout using just a plain piece of paper!

Here is a look at my layout
I have had this photo of my dad for some time, but wasn't sure how I wanted to scrap it.
Since it is a black and white photo, I didn't want to overwhelm the photo so the colors of these Authentique papers were great.

I wanted to use this paper, with these accent colors, but I didn't want the pattern on the paper to show. I decided to pleat the paper to distort the pattern.

I scored the paper every 1/2", then flipped it over and scored on the 1/4" intervals between the first score marks. So the paper ended up being scored every 1/4", with every other score mark alternating front and back.  Now the fun really begins!

Accordion fold the paper until it is pleated all the way across.
(This is time consuming and takes some practice, I admit. I recommend that you start with some fairly thin paper and make the score marks further apart, maybe every 1/2" instead of every 1/4" to practice. Once you get a feel for it, then work on the paper you want to use on your layout.)

You will need something extra strong to hold the pleated paper down, so I used a tape similar to Score Tape. Any very strong double sided tape will work. 

I adhered the pleated paper onto several other layers of paper, then matted my photo and adhere it on top using more double sided tape. 

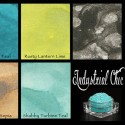
I used a variety of embellishments for my cluster. To color the wood leaves from Prima, I first covered with a layer of Molding Paste, using my paint brush to give it some texture. Once it was dry I used Time Travel Teal from Lindy's Stamp Gang Industrial Chic Magicals Set to color them. 

I hope you give this technique a try! It takes a little practice, but it is a great tool to have in your bag once you get the hang of it. 


3 Comments »

The Deconstructed Layout with Anita!!!

Wednesday, September 17, 2014

Hi everyone, it's Anita here today to share a new 
Deconstructed Layout with you this morning.
I hope you are enjoying these tutorials as much as I am!
Of course, I am using some fabulous products from Frosted Designs for my layout today.

For today's tutorial, we are going to talk about background texture. I love working with stencils and molding paste, but there are times when I want to add a little something more to it. 
For this layout, I wanted to really play up the color of the We R Memory Keepers paper, which was a beautiful  orange. So I grabbed a stencil, my Molding Paste and knife, some DISTRESS GLITTER and a jar of LINDY'S STAMP GANG FLAT SHOT  in Mango Mania.
I mixed some Distress Glitter (Clear Rock Candy) and My Mango Mania Flat Shot together in a small cup and set it aside. Once I had spread a THICK coat of molding paste and removed the stencil, I poured the mixture over the paste, letting the excess run off onto a scrap of paper. 
This is what you end up with. Now, the background will be PLAIN. The reason mine is orange, is because I sprayed it with Dylusions White Linen- the residual Flat Shot that was on the paper will turn colors when the spray hits it. If you don't want the paper to be colored, just don't spray it!
Set this aside to dry, like over night. Seriously. Then you will need to seal it. REALLY. 
You will need to seal it, or it will get all over your hands every time you touch it. 
Trust me on this. 
I use Helmar's Crystal Coat Matte Varnish, but any spray sealer will work.
I added Glitz 77 stickers, flowers, and resin accents from the Summer's End Kit, some lace and a chipboard from Blue Fern Studios. To color the chippie, I used plain old pan watercolors then misted with iridescent ink. 
I used Midnight Copper Embossing Powder from Lindy's Stamp Gang for my title.

Thanks so much for stopping by today!


4 Comments »

The Deconstructed Layout with Anita!

Wednesday, September 3, 2014

Hi everyone, it's Anita here today and  I have another installment in my Deconstructed Layout series to share with you

For my project I am using the fabulous Summer's End kit from Frosted Designs
 

Today's Deconstructed Layout is about using repeating patterns and colors. I really wanted my photo on this layout to stand out, but I still wanted to be able to use a fair amount of detail and embellishments on the page. 
In order to do this, I kept the colors to a minimum and repeated the same shapes over and over. 


Here's a look at my layout
My goal was to have lots of detail on the page, but make it blend into the background and let the photo shine in front. 
To make this happen, I 
1. repeated the same basic shape of the KRAFT DOILY from the kit several times.
*doilies
*stenciled background
*brads
*flowers
2. I REPEATED the pattern of the KRAFT DOILY on the edge of my punched strip
3. I picked a color from the photo (Golden Yellow)and went several shades lighter for the color of my embellishments/background

The Petaloo flowers included in the Summer's End kit were perfect, and I used a  We R paper from the kit to mat my photo.The Gold dots are from the December Mixed Media Kit, and the metal piece is from the Summer's End. 


This is the same cardstock I used to mat my photo with, I punched both edges and added a strip of glitter down the center. The die cut stickers is also included in the Summer's End kit.


On the kraft doily I inked the edges and added some faux stitching- and I cut them in half before I tucked them under the photo mat. Now, I still have 3 to use again on another project. I stamped here with Elle's Studio stamps and the brad is from the Capture the Moment's kit. 


I loved the resin accents from the kit, so to make them blend in I used the same ink on them as I used else where and buffed with a dry cloth. I added some ribbon and more pearls here. 


Thanks so much for stopping by today. 
I hope you have enjoyed this installment of my Deconstructed Layout series! 


4 Comments »

The Deconstructed Layout with Anita!

Monday, August 25, 2014


Hi everyone, it's Anita here today to share another Deconstructed Layout with you.

I am so loving the Capture The Moment Kit from Frosted Designs- I have made several layouts with it now and every single one looks different! Be sure to get one while they last. 


Today I want to talk about using a LOT of the same color, without overwhelming your layout with it. 
You CAN do it!
Here is a look at my layout. Of course, I had to have some pink on it. I used Prima papers from the Capture The Moment kit, and Princess Collection Kit.
This is my second layer from the bottom, and I love the pattern, but wanted more color. So after I punched the edges, I inked it- and I mean I really inked it! The ink extends about 2- 2.5" in from the edge. 
I started with the lightest color of ink I wanted to use, then added a darker color of ink
 just along the edge of the paper.
Next up, I used my VersaMark  around one side at a time, and added a bit of texture with Lindy's Stamp Gang Hibiscus Rose Orange Embossing Powder.
I also used Lindy's on my Blue Fern Studio's Chippie- this time Golden Angel Wings. You can see on the upper layer of paper, just under the chipboard, I stamped using the Heart Flourish Splash stamp and an ink one shade darker.  I added the small burlap flowers to the centers of a couple of larger flowers for the corners.
 I added more flowers, butterfly and brad, all included in the Capture the Moments kit, to the lower corner.
I also added some faux stitching with my Signo White pen.
This photo illustrates how I wanted to use my color how it all came together. For the most part my layout is a monotone, mainly PINK. However, I separated each layer of pink with a NEUTRAL. Starting from the corner there is;
1. The background page
2. the PINK punched page
3. the neutral flower die-cut and chipboard
4. the PINK edge of the punched paper
5. the white portion of the punched paper
6. the PINK cardstock
7. the photo
So, the moral of our story is this:
if you want to use one color in abundance, be sure to place it between layers of neutral colors
and it will be fabulous!
I hope you give this a try, and I would love to see how it turns out!


4 Comments »