Showing posts with label summers end. Show all posts

The Deconstructed Layout with Anita!!!

Wednesday, September 17, 2014

Hi everyone, it's Anita here today to share a new 
Deconstructed Layout with you this morning.
I hope you are enjoying these tutorials as much as I am!
Of course, I am using some fabulous products from Frosted Designs for my layout today.

For today's tutorial, we are going to talk about background texture. I love working with stencils and molding paste, but there are times when I want to add a little something more to it. 
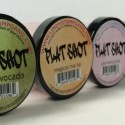
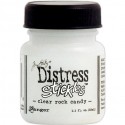
For this layout, I wanted to really play up the color of the We R Memory Keepers paper, which was a beautiful  orange. So I grabbed a stencil, my Molding Paste and knife, some DISTRESS GLITTER and a jar of LINDY'S STAMP GANG FLAT SHOT  in Mango Mania.
I mixed some Distress Glitter (Clear Rock Candy) and My Mango Mania Flat Shot together in a small cup and set it aside. Once I had spread a THICK coat of molding paste and removed the stencil, I poured the mixture over the paste, letting the excess run off onto a scrap of paper. 
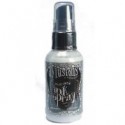
This is what you end up with. Now, the background will be PLAIN. The reason mine is orange, is because I sprayed it with Dylusions White Linen- the residual Flat Shot that was on the paper will turn colors when the spray hits it. If you don't want the paper to be colored, just don't spray it!
Set this aside to dry, like over night. Seriously. Then you will need to seal it. REALLY. 
You will need to seal it, or it will get all over your hands every time you touch it. 
Trust me on this. 
I use Helmar's Crystal Coat Matte Varnish, but any spray sealer will work.
I added Glitz 77 stickers, flowers, and resin accents from the Summer's End Kit, some lace and a chipboard from Blue Fern Studios. To color the chippie, I used plain old pan watercolors then misted with iridescent ink. 
I used Midnight Copper Embossing Powder from Lindy's Stamp Gang for my title.

Thanks so much for stopping by today!


4 Comments »
Absolutely Fabulous Layout with Brenshevia!!!

Monday, September 8, 2014

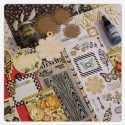
Good morning everyone, it's Brenshevia once again bringing you my project using the wonderful July Enchanted kit from Frosted Designs.  I cannot begin to tell you how much I love, LOVE the colors in this kit!! Everything in this kit goes so well together and it crosses over beautifully with the August Summer's End kit!  I threw in a few Prima flowers I had in my stash and what you see below is the result.  I think it turned out great, how about you?  


If you haven't checked out all the great items we have in the store, now is your chance.  Thanks for stopping by and spending a little time with us!

Smooches!

Products used from the Frosted Designs Store:


5 Comments »

Summer's End Altered Picture Frame with Michelle!

Thursday, August 21, 2014

Good morning all! Michelle here with you and today I have another project that I created using this month's beautiful "Summer's End" kit to share with you. This time I've decided to alter an 11 1/2 by 11 1/2 photo frame with goodies from the kit.

 I started with a large chipboard photo frame that I picked up for next to nothing at a local craft store. I primed the frame with a layer a gesso. Once the gesso dried I sprayed it with the Tattered Angels' "Cornflower" blue chalkboard spray from the kit and allowed it to dry. To give the frame some texture I used the Tim Holtz "woodgrain" stencil from the kit and some modeling paste, including the edges. Before the modeling paste dried I sprayed the frame with the Cornflower chalkboard spray again, giving it a good coating. Then I also sprayed some Tattered Angels' "Frost" so the blues mingled and I got a two tone effect.
I embellished the frame with the kraft doilies, ribbon, and some of the wood veneers from the kit. I also used a few flowers and gems from my stash.
I placed one of the adorable resin fairies from the kit in the lower corner.
Thanks so much for dropping by! Hope you have a creative day!
Products used:


5 Comments »

Tutorial Tuesday with Rachelle!

Tuesday, August 19, 2014

Hi there FD friends! Rachelle here and I am excited to share today's tutorial for this layout I created using this month's kit; "Summer's End." This kit is filled with an array of beautiful fall colors of paper and embellishments. Grab a cup of coffee and follow along the steps!

"Per*fect Memories!"

~Step 1~
 To create this page I used the beautiful fall colors within this kit. The brown, blue, gold, and tan tones present such striking display of artistry colors. I started with teal blue cardstock for the background and topped it off with a 12x12 Summer Meadow collection paper. I cut out a square from that paper and turned it over for a goldtone center. Next I paper punch white cardstock for the center border. Then it was time to create a scallop border on the edges on the Summer Meadow paper adding a double pinch to each corner.

 ~Step 2~


Now it's time to create a texturized background using homemade texture paste, clock stencil, and Glimmer Mist Chalkboard - Cornflower. Then I added a Prima text stamp using brown ink. Allow to dry. Now it's time to add layers and more layers from the collection paper followed by adding an array of beautiful embellishments. I started using the metal charm clocks, embossed stickers,and those awesome Petaloo flowers.

~Step 3~

Here you can see the beautiful cluster of flowers, with the lace blue bow, and the wooden doilie. By the way, when using the glimmer mist be sure to shake well until you see the tiny bubbles. Then open the bottle just a bit to release the air. Now your ready to use the mist.

~Step 4~
Here I painted the wooden leaves and created a cute little corner using enamel dots and kraft twine. I also used the embossed stickers and kraft doilie. You can see the splats of the gilmmer mist and ink stamp on top of the textured clock.

~Step 5~

Here you can see more of the elements, textured background and title I created for this layout. I love how the layers of the this beautiful collection paper blended together.

~Step 6~

The picture I used shows beautiful fall colors of brown, red, and tan. By the way this lovely little lady is Megan, daughter of my friend. This picture blends in well with the fall tones of this layout.

 ~Step 7~
 Finally, I applied the journal to this layout. All done!!  I hope you enjoyed viewing my page today as much as I enjoyed creating it!  Make sure you stop by the Frosted Design Store for this kit and more fantastic products. Thanks for stopping by, your kind comments always make my day!

See Ya Soon!


*Summer's End 
Summer's End Kit

8 Comments »

Summer's End Scrapbook Layout with Michelle!

Tuesday, August 12, 2014

Hey there everyone! Michelle here with you and today I have my first project using the August kit "Summer's End" from the Frosted Design's Store. I have to say I love this gorgeous kit, it was perfect for showcasing this photo of my daughter.


To add a bit more texture and interest on the background I added some of the tattered mica fragments that comes in the "messy" kit. I simply swiped liquid glue with my finger in random areas and then sprinkled the mica fragments over it.


The beautiful Prima resin feathers from the kit were a perfect additional element tucked in the flower cluster.


Thanks for coming by! Hope you have a wonderful day!


Products used from the Frosted Design's Store:


7 Comments »

Summer's End Altered Clipboard with Rachelle!

Thursday, August 7, 2014

THURSDAY, AUGUST 7, 2014

Hi there FD friends! Rachelle here today sharing my altered art clipboard with a surprise ending. I used the beautiful August Kit~Summer's End to create this clipboard. Let's get started with a basic clipboard.


Now let's look at the project. From the clipboard to this:

"Create" 

Here's how to create the altered art. First all chipboard and wooden elements were painted and inked.
Next, I applied layers We R Farmers Market - Heritage 12x12 Paper and light blue 12x12 cardstock to the board. Then I paper punched the blue cardstock and yellow cardstock and applied to the board.


Now it's time to apply the texture paste and use a Prima stencil. Allow to dry and begin inking and using Gimmer Mist Chalkboard - Cornflower and let dry. Then I started applying the embellishments. This kit came with beautiful
Prima Marketing Resin Icons - Fairies, Prima Marketing Resin Icons - Feathers, and Petaloo Penny Lane Mini Wild Roses - Peach. I also used Petallo roses from the July Kit, gold and teal.


 I continued applying the elements which included Petaloo Penny Lane Mix Flowers - Yellow and Trimcraft Curiosity Corner Metal Charms -clocks. I love working with clocks and metal charms because they add the perfect touch.


I applied yellow lace at the bottom and top along with a string of pearls. Next I placed the bird and birdcage on top of the We R Memory Keepers Indian Summer Wood Tags. The final touch was to place the light blue metal flower at the top of the clip, ribbons, Prima Laser Cuts - Leaves and Mushrooms, and more Prima Marketing Resin Icons - Fairies. All done! Now for a surprise.
I created this lovely card using hues of brown, yellow, and teal.


I distressed and inked the edges, applied the We R Memory Keepers Indian Summer Embossed Stickers and We R Indian Summer - Wildflower 12x12 Paper. You can see the layers that I applied along with all the beautiful embellishments.

So there you have it! The altered clipboard and card all created with the beautiful products from the August Kit~"Summer's End."

I hope you like these projects and have been inspired to create your project. I can't wait to see it!

Thanks for stopping by today and be sure to stop by the Frosted Designs Store for this kit and many more products for all your craft needs. You will be glad you did!

That's it for now. It has been fun and let me know what you think!
 See ya soon!


*Summer's End

 August Kit~"Summer's End"

5 Comments »