Showing posts with label august. Show all posts

Summer's End Altered Picture Frame with Michelle!

Thursday, August 21, 2014

Good morning all! Michelle here with you and today I have another project that I created using this month's beautiful "Summer's End" kit to share with you. This time I've decided to alter an 11 1/2 by 11 1/2 photo frame with goodies from the kit.

 I started with a large chipboard photo frame that I picked up for next to nothing at a local craft store. I primed the frame with a layer a gesso. Once the gesso dried I sprayed it with the Tattered Angels' "Cornflower" blue chalkboard spray from the kit and allowed it to dry. To give the frame some texture I used the Tim Holtz "woodgrain" stencil from the kit and some modeling paste, including the edges. Before the modeling paste dried I sprayed the frame with the Cornflower chalkboard spray again, giving it a good coating. Then I also sprayed some Tattered Angels' "Frost" so the blues mingled and I got a two tone effect.
I embellished the frame with the kraft doilies, ribbon, and some of the wood veneers from the kit. I also used a few flowers and gems from my stash.
I placed one of the adorable resin fairies from the kit in the lower corner.
Thanks so much for dropping by! Hope you have a creative day!
Products used:


5 Comments »

Tutorial Tuesday with Rachelle!

Tuesday, August 19, 2014

Hi there FD friends! Rachelle here and I am excited to share today's tutorial for this layout I created using this month's kit; "Summer's End." This kit is filled with an array of beautiful fall colors of paper and embellishments. Grab a cup of coffee and follow along the steps!

"Per*fect Memories!"

~Step 1~
 To create this page I used the beautiful fall colors within this kit. The brown, blue, gold, and tan tones present such striking display of artistry colors. I started with teal blue cardstock for the background and topped it off with a 12x12 Summer Meadow collection paper. I cut out a square from that paper and turned it over for a goldtone center. Next I paper punch white cardstock for the center border. Then it was time to create a scallop border on the edges on the Summer Meadow paper adding a double pinch to each corner.

 ~Step 2~


Now it's time to create a texturized background using homemade texture paste, clock stencil, and Glimmer Mist Chalkboard - Cornflower. Then I added a Prima text stamp using brown ink. Allow to dry. Now it's time to add layers and more layers from the collection paper followed by adding an array of beautiful embellishments. I started using the metal charm clocks, embossed stickers,and those awesome Petaloo flowers.

~Step 3~

Here you can see the beautiful cluster of flowers, with the lace blue bow, and the wooden doilie. By the way, when using the glimmer mist be sure to shake well until you see the tiny bubbles. Then open the bottle just a bit to release the air. Now your ready to use the mist.

~Step 4~
Here I painted the wooden leaves and created a cute little corner using enamel dots and kraft twine. I also used the embossed stickers and kraft doilie. You can see the splats of the gilmmer mist and ink stamp on top of the textured clock.

~Step 5~

Here you can see more of the elements, textured background and title I created for this layout. I love how the layers of the this beautiful collection paper blended together.

~Step 6~

The picture I used shows beautiful fall colors of brown, red, and tan. By the way this lovely little lady is Megan, daughter of my friend. This picture blends in well with the fall tones of this layout.

 ~Step 7~
 Finally, I applied the journal to this layout. All done!!  I hope you enjoyed viewing my page today as much as I enjoyed creating it!  Make sure you stop by the Frosted Design Store for this kit and more fantastic products. Thanks for stopping by, your kind comments always make my day!

See Ya Soon!


*Summer's End 
Summer's End Kit

8 Comments »

Stamps, Mask, and Paper Clips Top 3 and Winner!

Thursday, August 14, 2014

Hey there crafters and Happy Thursday!!!!  Just popping in to share the winner and features from our last challenge!!

We appreciate all your fabulous entries and can see how much each and every one of you dedicate so much time to your crafts!! We try to choose participants from all skill levels with a variety of different projects! So... Without further ado... Our Top 3 as chosen by our Design Team are (in no particular order):
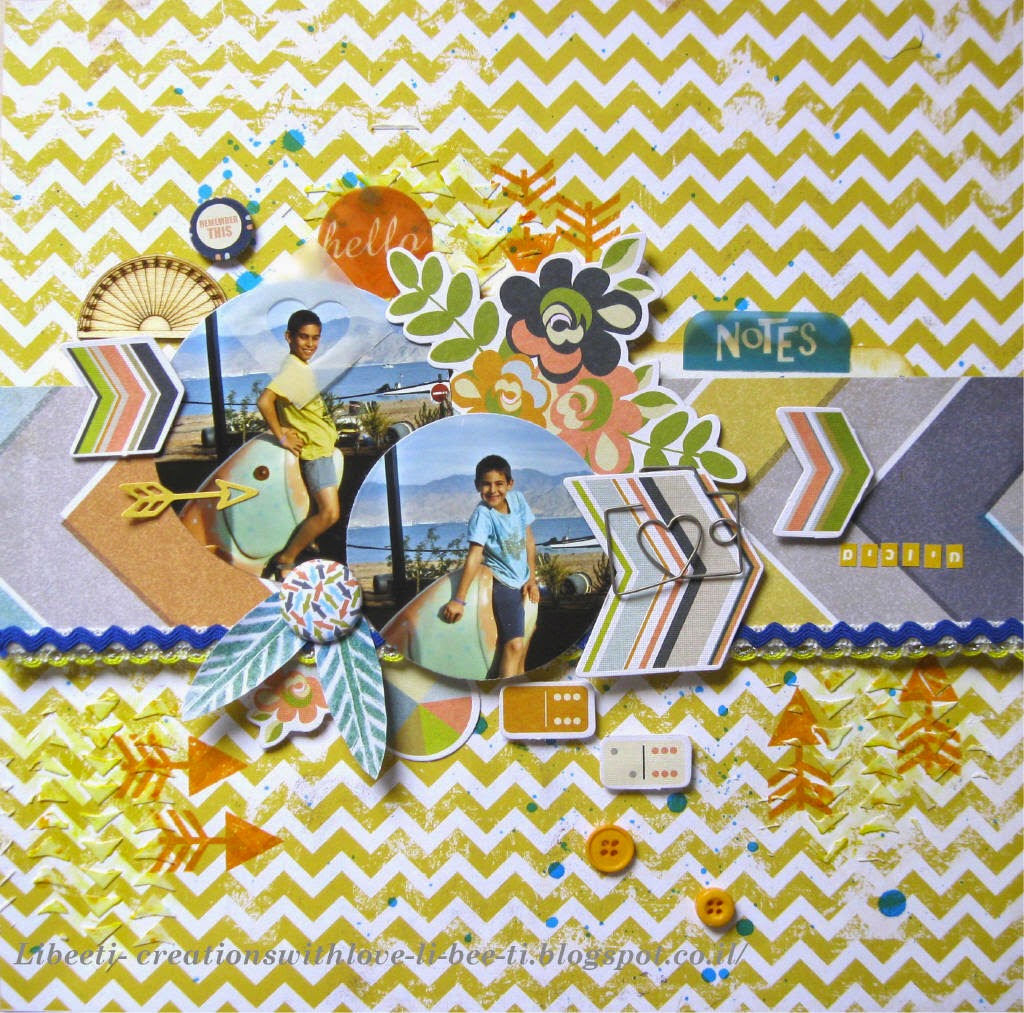
Libeeti


Melinda


Erina


BIG congrats ladies!!!!  These pages are AMAZING!!!!!!!!!!!  Please email me at Brandimatos@gmail.com to get a blinkie for your blog!!!!


We would like to give a BIG THANK YOU to our sponsor... Scrapmatts!!!!


Scrapmatts is an Australian based company specializing in laser cut chipboard pieces and many other items!! Stop by their store to see all of their fabulous products! They are providing a prize pack valued at over $30.00 in their laser cut chipboard pieces to one of the lucky participants of this challenge!!!!

And our winner... As chosen by Random.org is...

Marine!!!!
Marine linked up this fabulous page:


Congrats Marine!  Please email me at Brandimatos@gmail.com within the next seven days to claim your prize!!!!

6 Comments »

Summer's End Scrapbook Layout with Michelle!

Tuesday, August 12, 2014

Hey there everyone! Michelle here with you and today I have my first project using the August kit "Summer's End" from the Frosted Design's Store. I have to say I love this gorgeous kit, it was perfect for showcasing this photo of my daughter.


To add a bit more texture and interest on the background I added some of the tattered mica fragments that comes in the "messy" kit. I simply swiped liquid glue with my finger in random areas and then sprinkled the mica fragments over it.


The beautiful Prima resin feathers from the kit were a perfect additional element tucked in the flower cluster.


Thanks for coming by! Hope you have a wonderful day!


Products used from the Frosted Design's Store:


7 Comments »

Altered Shadow Box with Summer's End and NEW Kit Challenge!!!!

Tuesday, August 5, 2014

Hello out there to all my crafty friends!!!  August is upon us, which means Fall is right around the corner!  I just love the beautiful colors of Fall, but terribly miss the warmth of Summer!  Well Frosted Designs has the perfect solution....  Summer's End August Kit of the Month!


This kit has beautiful hues, including blue, gold, and a touch of red!  It's great for all your summer photos, and upcoming Fall ones as well!

We also have a FANTASTIC prize lined up this month!!!

Scrappmatts has graciously offered a prize pack valued at over $30.00 to one lucky participant in this month's Kit Challenge!!!!! All you have to do is enter your project using ANY Frosted Design's Kit (this month's or any previous ones as well!) for your chance to win!  We will draw a random winner from the entries at the end of the month!


Now onto my project!
I recently purchased a shadow box at my local craft store (I am a bargain hunter and these were nearly free!).  When this kit arrived, I knew exactly how I wanted to put it to use!  Here's a look:


Aren't these colors amazing?!?  Oh, I just LOVE them!  These are family pics taken many years ago, but are still seen around my house in all sorts of places!  

I started by painting my box a cool white color, then used some mod podge (matt used here) to adhere my papers into place!  I grabbed my Xacto knife to cut out the center piece of paper to let that inside show through, then used a white Uni Ball pen to add faux stitching around the entire box!  


I've stated before that Frosted Design's kits are so wonderful, that you can use them together to create all sorts of fabulous things!  Well, I used the bottle caps, metal scissor trinket, flowers, and stickers all from previous kits!  I also used the sticker flowers and Petaloo flowers from this kit to create a cluster at the bottom of my box (the Blue Chalkboard mist came in handy to die my flower!), and added one of the doilies beneath it.


I used more of the blue mist to spray my background die-cut and add small splatters across my page!


I finished the box with other stickers and flowers included in the kit, and more faux stitching around the papers on the inside!


Well gang...  Thanks so much for stopping in and have a LUCKY day :-)


Products used from the Frosted Designs Store:


6 Comments »

Friday Challenge: Stamps, Masks, and Paper Clips, Oh My!

Friday, August 1, 2014

Hello everyone! It's Athanasia here and today it is my turn to host the challenge! After a lot of thinking I decided to go with three of my favorite things I use for my creations, so here is my recipe challenge:

STAMPS, MASKS and PAPER CLIPS!
Your challenge, should you choose to accept, is to include on your project at least one, or more, of each... whatever you like!

For my page I used a lot of stamps as always, because I like to blend the patterns of them to create my own background on the paper. I colored some stamped flowers with my gelatos - I love the watercolor effect they make! I used one mask again with the gelatos and then I highlighted some spots with my pen. Finally I used the Maya Road bicycle paperclip which I think is very cute, some decorative pins, a couple of Petaloo flowers and buttons. The paper is from the Studio Calico Printshop collection and I absolutely love the pattern! 
I hope you like the recipe and I can't wait to see your creations with these three 'ingredients' :)

                                                            
Products from the store
:Studio Calico Printshop 12x12 Paper Pad


Julie
                               
Products used:


Products used from the Frosted Designs Store:
Elle's Studio Cameron - Tidbits
Elle's Studio Everyday Moments - Stamp
Elle's Studio Everyday Moments - Cutouts
Elle's Studio Letter & Number Stickers - Teal
Studio Calico Thataway Plastic Die-Cuts - Stars
Studio Calico Printshop Wood Veneers - Hearts
Studio Calico Wood Veneers - Cameras
Basic Grey Capture Wood Veneer Die-Cuts
Um-Wow Diamond Confetti
Heidi Swapp Mini Stencils - Shapes

                                       
Products Used:


(I used my stencil to handstitch the pattern).
Products from the store:


We would also like to welcome back our Elite Sponsor, Scrapmatts for this challenge!


Scrapmatts is an Australian based company specializing in laser cut chipboard pieces and many other items!!  Stop by their store to see all of their fabulous products!  They are providing a prize pack valued at over $30.00 in their laser cut chipboard pieces to one of the lucky participants of this challenge!!!!

You have until noon, August the 13th to upload your entries!!!  What are you waiting for?!?  Let's get creative!!


8 Comments »