Showing posts with label october. Show all posts

Birthday Fun with Channa!

Wednesday, October 29, 2014

Good morning all, 

Channa here with a card for you today!

With buying a paper kit or collection you will always have some small left over pieces. 
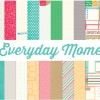
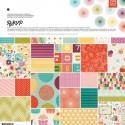
I used the collection package of Elle's studio, Every day moments. 

This is my card:

I used a stamp from my own stash to make this Fun Birthday card!
As you can see i used all kinds of little pieces of paper, all the bright colors make it a very happy card. 


Below you can see some layering with a balloon stamp. 


Thank you all for passing by and have a great day!


Items used from FD Shop:

3 Comments »

Fall Colors and Bling Winner and Top 3!!!!!!!!!!

Friday, October 24, 2014

Hello again everyone!!! We're just popping in to share winners from our Fall Themed Friday Challenge as well as our top 3 featured projects!!!!

We appreciate all your fabulous entries and can see how much each and every one of you dedicate so much time to your crafts!! We try to choose participants from all skill levels with a variety of different projects! So... Without further ado... Our Top 3 as chosen by our Design Team are (in no particular order):


Kanda


Hazel


Erina


Congrats ladies!!!! Please contact Brandimatos@gmail.com to get a fabulous new blinkie for your blog!!!

Now onto our randomly selected winner:


We would also like to welcome back Scrapmatts as this challenge's sponsor!!!!

Scrapmatts is offering up a prize pack of chipboard valued at over $30.00!!!!


And the winner as chosen by Random.org is:


Renee Johnson!!!!!!


Congrats everyone!!!! Please contact Brandimatos@gmail.com to claim your prize within the next seven days!!!


Want to stay up to date on the latest sales and promotions?!? Make sure you stop by and "like" the Frosted Designs Store Facebook page!!! Join our Facebook group for daily inspiration from our DT and other fabulous members!!!


Well gang... Thanks for stopping in and have a LUCKY day :-)

3 Comments »

The Deconstructed Layout with Anita!

Wednesday, October 22, 2014

Hi everyone, it's Anita here today and I have another
Deconstructed Layout to share with you today.
I am using some wonderful papers and supplies from
for my project. Be sure to check the store for the latest items and sales! Today my project is about making your own background.

Here is a look at my project
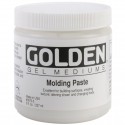
 I started with a plain piece of cardstock and used stencils, Gelatos®, watercolor and pastel pencils, molding paste, stamps, and spray inks to alter it. 


If you would like to see more of The Deconstructed Layouts
the entire series is shown HERE.


2 Comments »

Tutorial Tuesday with Brandi: Making a Mixed Media Card from Start to Finish!

Tuesday, October 21, 2014

Hello fellow crafters!!!  I'm up on the Frosted Design's Blog today with a tutorial for a mixed media card!  Let's take a look, shall we?!?

I used this month's Garden of Abundance Kit which was designed by yours truly!  Here's my finished card (I used the current sketch #109 over at Cardabilities by the ever-so-talented Karen Gerber!):


Now, here's a look at how I made this cad in just a few simple steps!
 First, grab the papers you want to use and measure them to size (4.75x6.75 here to mount on 5x7 card base).  Add some texture using your favorite stencil and molding paste or something similar.  Ink the edges with the lighter ink in the kit, making sure to come in some on the actual card.  Finish the edges with black ink.  


Ink the edges of your outer piece, then use a distress tool around all the edges!  Grab some chipboard (flourish 18 used here from the Creative Embellishments Store) and color it with your favorite mediums! Layer it all on your card base and embellish as desired :-)

See how easy that is?!?  Here are some close-ups:


And here is another card I created this month's fabulous kit!  Details for this one can be found here!!!


Well gang...  Thanks so much for stopping in and have a LUCKY day :-)


Products used from the Frosted Designs Store:

5 Comments »

A Little Bit of This, A Little Bit of That with Solange!

Wednesday, October 15, 2014

Hello everybody!
Today, I would like to share with you one of my favorite tip about paper: mixing two (and only two) collections together...
Okay, it's not new, but it's so fun! It's a great way to use favorite collections with a new look (or even to use scraps), and it's so much faster than to build up your own kit from many different manufacturers... And you still get this fresh look!

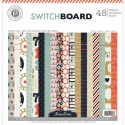
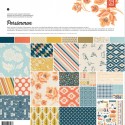
For my first layout, I wanted to use again my beloved "Persimmon" papers (Basic Grey), perfect for fall, and I decided to match them with some "Switchboard"papers (Pink Paislee).


For my second layout, I had very few "Vintage Bliss" leftovers (Simple Stories), but I loved this collection so much that I really wanted to use them... And I finally found that they matched beautifully with "RSVP" papers (Basic Grey)!
The yellow background, the pink border, the aqua and orange titles are all from the "RSVP" collection.


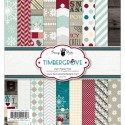
What to do with last year Holidays papers? Why not matching them with summer papers! Here, I used two Fancy Pants collections: the wintery "Timbergrove" (the grid and the red paper) and the summery "Nautical" (the blue and the woodgrain papers). I cut them with a heart die and I outlined each of them with a white pen.
Papers from the same manufacturer often match well!


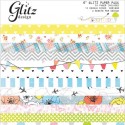
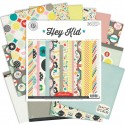
Another tip is to start with a multicolored paper from one collection, and to look for matching papers from another collection (one color papers work better for this), like I did on this last layout with papers from "Brightside" (Glitz Design) and from "Hey kid" (Pink Paislee):


I also used my "Magicals" from Lindy Stamp's Gang on each of my layouts: the powder form is so versatile, you can use it to color any medium of your choice!

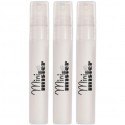
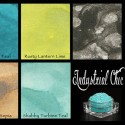
- I started by mixing the "Shabby Turbine Teal" color with some water in a mini mister, and I used it with a Heidi Swapp chevron stencil on my first layout.
- Then, I mixed the "Rusty Lantern Lime" color with some white Gesso, and I used it with a woodgrain stencil on my second layout. The effect is of course totally different!
- Next, I mixed the "Steel Shimmer" color (which is a beautiful and rich silver and not a black) with very VERY few water to create a silver paint, and I used it to color my title on my third layout.
-Finally, I mixed the "Steel Shimmer" color again with some white modeling paste, and I used it with a star stencil on my last layout.


I noticed that with both white gesso and white modeling paste, you get a lighter color, and if you want to keep all the wonderful shimmery look, you need to use water (spray ink or paint, depending on how much water you use).
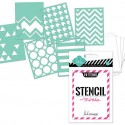
Looking for stencils? Take a look at the Frosted Designs store!


6 Comments »

Garden of Abundance Altered Fan with Rachelle!
Thursday, October 9, 2014

Hi there FD friends! Rachelle here today on the blog sharing my project I created using this gorgeous October kit~"Garden of Abundance." There is so much you can create using this kit. Take a look.
 Altered Fan


This is how this all started. I created the fan and applied lace and pearls. Then I started at the bottom worked up to the center and sides. I wanted a shabby chic, vintage style. Next I applied prima ink to the folds.


The best way to create the folds is to use a score board. They come out perfectly. I applied the beautiful Prima flowers, minature rose buds and the pretty lace flowers from an earlier kit.

Next comes the layers and layers of beautiful cardstock.
I so love working with the beautiful Prima products. I applied the butterflies and metal bird.


Next, more  beautiful embellishments.

Nearly done! It's time to finish the bottom of the fan with ribbon, lace, pearls and a doily.


There you have it! Project finished. I hope you enjoyed the fan and this gorgeous kit. Thanks for stopping by today and remember to stop by the
Frosted Design Store   for this kit and all the fantastic products for your next project. 

See Ya Soon!
Huggies!!


4 Comments »