Showing posts with label Echo Park. Show all posts

Project Life with Channa!

Saturday, March 29, 2014

Hello Everybody, 

It's Channa here, to share with you my Project life!
I just started this year with Project life and i am still in the exploring mode. 

Here are my pages for week 3, 4 & 5:


As you can see i used the Photo Freedom pack 2, from Echo park. 
Amazing bright colors with different designs. The kit comes with six 12 x12 double sided papers, 1 12 x 12 element stickers and 5 designer photo sleeves. 


As mentioned before i am still exploring project life, at the moment i have one week on 2 pages. But i have already realized when it is just a regular week it is hard to make a 2 page spread. I think i will just go along with the amount of pictures that i have for the week. 


What i love about project life is the clean look, as much as i love my flowers and all kind of embellishments on layouts and other projects. To be honest i thought that it would be really quick and easy to have PL book  but i still take my time with it, how to place the pictures?, which pictures to put? what paper to use? 


I think it's an excellent and pretty way to document life!! 
Thank you for passing by and have a great day, 

 photo Channa_zpsc614ff16.jpg


1 Comment »

Jeaunes is Thankful for this Beautiful Life!

Friday, March 21, 2014


CLICK HERE TO JOIN THE FROSTED DESIGNS FAVORITE THINGS BLOG HOP! 


Hi there ladies, I really hope everyone in the Northern hemisphere is having an awesome spring and are excited for the summer!  Here in South Africa, we have really been having some crappy weather with LOTS of rain!!!!!!!!!!!!!!!!!!!!!!!!!!!


But enough about the weather, today I am here to share another two single Project Life inspired pages with you!  The pictures were take on the same day, but some were taken in the morning and the rest were taken in the afternoon, after Jonathan was bathed and changed.

Here is the first page, the right hand side.


These pictures were taken in the afternoon and early evening, after we bathed Jonathan and changed him into this blue and white outfit.  


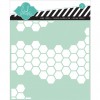
I included a Project Life card here which I embellished with a felt heart cut from my Cuttlebug, some staples, buttons and bling.

The journalling on this card reads:
"Thursday - our last day in hospital.  After your bath that morning, mommy dressed you in the blue & white babygrow.  Even though it was "newborn" size it still seemed too big for you.  these were some of the first pictures mommy took of you being awake."


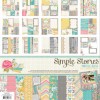
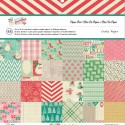
I used bits and pieces of the Vintage collection from Simple Stories to finish the page off with.
And now on to the second page!!!!!!!!!


This one is so far my favourite and I had tons of fun with this page!!!!!!!!!!


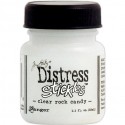
So, dear Mr Tim Holtz (huge fan over!!!!!!!!!!!!!!!!!!!!!) was in South Africa during March and I was lucky enough to be able to attend his class.......  One of the awesome things he bought us and that we worked with was his brand new 1" distressing ink pads, and oh my word, they are stunning!!!!!!!!!!!!!!!!!!!!!  So what did I do when I got home, you guessed it, used the mini distressing ink pads!!!!!!!!!!! 

I covered cardstock with old book paper, and did some stencil work with Tim Holtz distress ink on it.   Once this was done, I included some chipboard elements, a rub-on and some die-cuts I had lying around.  

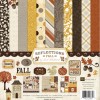
For this card, I cut a piece from the Echo Park Fall collections, added some die-cuts and stitching.  


So that concludes my Project Life pages for this week!  I hope you enjoyed them!  But wait, I am not done...........................

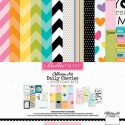
We have some Project Life inspired products on sale this week!!!!!!!!!!!!!!!!!!!  ALL Project Life Type products are 30% off. This includes the Becky Higgins brand new Project Life Kit and Transparency Overlays as well as Simple Stories Homespun Collection and all the new lines from Elle's Studios! Project Life products can be found HERE!

Be sure to use code PL30 at checkout to receive the discount! 


So head on over to the store and fill those shopping carts!!!!!!


 photo Jeaunes_zps9ad9b8fb.jpg

4 Comments »

Valentine's Day is Just Around the Corner!

Saturday, January 25, 2014

Hello, everyone!   Brenda here with a few ideas for some Valentine's Day cards.

If you saw my craft room, you would think I had enough patterned paper to cover every possible occasion, but I have to admit that there is one area that is sadly lacking - Valentine's Day.  I don't have any Valentine themed papers in my stash, so I challenged myself to create some Valentine's Day cards from other themed papers.  Here's what I created, using Fall and Winter papers from the Frosted Designs store.

These papers are from various collections from BoBunny, Crate Paper, Bella Blvd., and Echo Park.  Here are the details on the cards.

I started with the large heart from the Polka Dot Party wood veneer shapes package and some striped paper from BoBunny's "Elf Magic" collection.  I traced the heart onto the paper, and then again about 1/4" outside the lines and cut on the larger outline to get the opening.  I stitched around the opening and around the card edges, then adhered the paper to a white card base.  I painted the heart red, then covered it with glue and red glitter and adhered it to the card, centering it in the opening.  I used a fine tip black pen to write "love" in various spots on the lines of the patterned paper and added a red ribbon bow to finish it off.


The main portion of this card is a journaling card from the Crate Paper "Bundled Up" collection; the zigzag stitching was already on the card - yay!  I diecut three hearts from two of the papers in the same collection and adhered them to the journaling card, with the middle heart popped up with foam adhesive.  I added letter stickers to the large heart, and a wooden arrow underneath.  I used scissors to snip the wooden arrow in half and tucked the cut edges under the heart.  A few ink splatters finished off the card.


Sometimes you need a Valentine's Day card that's not quite so red/pink/lovey dovey.  For this card, I used the Echo Park Fall Reflections collection.  I backed the sentiment sticker with brown cardstock and trimmed around it to leave a narrow mat, then adhered it with foam adhesive to a piece of patterned paper.  I added a couple of chipboard hearts, coated with Rock Candy Distress Stickles (my favorite Stickles ever!) and a brown bow.

The last card uses papers from Bella Blvd's "Daily Chevies" line and BoBunny's "Elf Magic" line.  I cut two different size squares of patterned paper and adhered them to white cardstock, using a Maya Road heart bubble clip at the top.  The alphabet stickers are also from the "Elf Magic" collection, and three wooden hearts finish off the card.  I added pink Stickles to the hearts and the inside of the heart on the metal clip.

I hope you're inspired to use your stash and create some Valentine's Day cards!


4 Comments »

Lisa Warms Up with Photo Freedom!

Monday, January 20, 2014


Happy Monday everyone! Lisa here, and I am so excited to share my first post with you.  Today I am sharing a layout made with the fun Echo Park Photo Freedom Volume 2 line.  I love scrapping summer pictures in the winter, these warm memories always warm me up! I think you will agree that the colors of this line are so versatile that you can use any kind of photos with them.
Here is my layout:


I wanted to share a little trick for altering the 3 x 4 cards many collections come with. To give more texture to the cards I often will cut out a quote or saying on one card and then pop it onto another card using foam dots.  Here I cut the banner from one card:
 

Popped it over this card:

To create a new card with more dimension:

I also love to use the jornaling cards found in most collections, however I often have trouble using the larger ones on my layouts.  One trick is to use them under a portion of your layout for hidden journaling:


Here is how I created my own journaling card using a Top Ten card from the Bella Blvd Snapshots collection .  First I took this card:

Then I added a sticker that from the Echo Park line that matches my photos and journaling better.  Then I typed out my journaling and added it.
In the end I decided that the stars at the bottom were to cute to hide and since I didn't use the bottom of the card for journaling, I ended up cutting it off, shortening the card and saving these cute stars for another layout in the future!  Adapting your 3 x 4 cards or journaling pieces is a great way to use them with another collection.  I had used up almost all my paper in the Bella Blvd Snapshots collection but still had journaling cards left, and of course, there is no need to throw them out, why not work them in with another collection! It's a great way to put your left overs to use!  I'd love to hear your tips for adapting your left overs to stretch your stash. Please make sure and share in the comments, inquiring minds want to know!  Here's to a creative Monday!


5 Comments »