Showing posts with label Simple Stories. Show all posts

Pretty Paper + Sketches = 8 FABULOUS cards!

Saturday, July 19, 2014


Hello everybody!
I am thrilled to be part of this wonderful team, and I am so excited to share my first project with you...

My name is Solange, but some of you may know me with my online name "Isbaha". I am a 36 years old stay-at-home mother to three boys (2-4-6 years old) and I live in a tiny French village.
I love everything with paper : mini albums, layouts, cards, tags, boxes... but if I had to choose only one, it might be anything that you can offer ! I enjoy everything homemade, especially embellishments, and I try to share what I know with tutorials.

So now, let's see my project for today... Here is a tutorial for creating a set of 8 cards from only 12 patterned papers (6x6) and 3 cardstocks (12x12)! Almost no leftovers here...
Need to have some greeting cards ahead (Christmas in July, anyone?) or maybe some all-occasions cards available? This tutorial also works great for making a set of cards to offer, and... You will finally use some of these cute 6x6 paper pads!

To show you how versatile this tutorial is, I made three sets of cards.
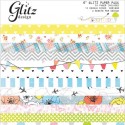
The first one uses the brand new Glitz paper pad "Brightside" and has a modern look:


 See larger pictures of the cards on Snapguide:


Don't you think that the flairs from the Lucky Charm collection match the color palette of the Glitz papers in a nice way?
And look at this stamp set by Elle's Studio: I bought it because of the sentiment (it looks really great on the cards), but my favorite stamps are the hearts, they look fabulous when layered (black ink for the outlined heart and colored ink for the solid heart)! 
I used pop dots for some of them. The sentiment is embossed with white embossing powder.


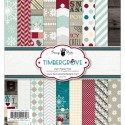
The second set of cards uses a Fancy Pants winter paper pad "Timbergrove" (and good news, it's on sale!), and the look is more traditionnal:


See larger pictures of the cards on Snapguide:

How to Create 8 Cards With 12 Papers (6*6): Set 2

For this set of cards, I wanted a more distressed look, so I decided to play with my brand new Magicals by Lindy's Stamp Gang.

These powders are supposed to be mixed with a medium before using them, but I plan to keep them in their powder form and to only mix the needed amount with different mediums when I want. This color palette is right up my alley, so I figured that I would have many uses for them!
So this time, I decided to mix my Magicals with my embossing powders.

First, I mixed some white embossing powder with clear embossing powder: it gives an interesting distressed look to the final result, because some of the pattern is white, and some is clear BUT it can't be colored because of the clear embossing, so you can see the color of the background.
(Note: mix only the needed amount of powder in case you don't like the look!)
Then, I added just a little of Time Travel Time Magicals powder and I mixed it carefully.

Even when heat embossing, there is not enough wet to make the Magicals react and color the embossing powder, but here is what I discovered: if you rub on the embossed stamping, then, the color appears, like by magic! You can use a very-very slightly wet wipe (be careful, the more wet you use, the more "painted" look you have!) or just your finger for a subtler look.

Finally, I added shadows with a brown pen, to highlight my sentiment. I am so excited to try my Magicals with other mediums and see what happens!
(For information, my sentiment means "Season's greetings" in french).


Finally, the last set of cards  uses leftovers of one of my all-time favorite 12x12 paper pack by Simple Stories: "Vintage Bliss" (this one is on sale too!), so I had to be a litlte more creative to make the cutting diagrams fit my leftovers, but it worked. 
Now, I can see more cards with my leftovers and this tutorial in my future!


See larger pictures of the cards on Snapguide:

Check out How to Create 8 Cards With 12 Papers (6*6): Set 1 by Solange Jacquet on Snapguide.

In my sample above, I used homemade paper bows to embellish most of my cards, and I cut them from the leftovers. See a tutorial for making these paper bows (without any die) here: http://scrapyourscraps.blogspot.fr/2014/05/paper-die-cuts-paper-bows.html.

Or of course, you can use any other embellishments!


TUTORIAL

1. Choose 3 cardstocks (12x12) in neutral color and cut 8 cards (6x4). The remaining cardstock will be used to stamp the sentiments, add borders or make embellishments. Note that the card F also uses a (3-7/8 x 5-7/8) cardstock background.

2. Choose 12 patterned papers (6 patterns twice) from a 6x6 paper pad. See instructions about how to choose the patterns according to the cutting diagrams on the Snapguide.


3. Cut all the pieces following the cutting diagrams: don't forget to write the cardsketch letter on each piece (on the side you're not going to use)!

4. Gather all the patterned paper pieces for each sketch (looking at the letter on each piece) and put the cards together. Here are the sketches:


5. Using the remaining patterned paper, make your own embellishments and/or add embellishments from your stash.

6. The card F mainly uses paper strips onto a cardstock background (3-7/8 x 5-7/8), so leftovers are perfect for that, they are not included in the cutting diagrams.

I hope you enjoyed this tutorial, and please, let me know if you used it!


7 Comments »

A Sweet Layout with Lisa!

Saturday, June 28, 2014

Good morning!  Lisa  here today to share with you a layout I made using the ever so versatile Simple Stories line Homespun!   This line is so versatile, you can use it for about any type of occasion!  From Spring to Summer to just every day moments!  It also has a baking or cooking theme to it and that is what I captured in my layout:

I have been trying to use up a lot of the 3 x 4 and 4 x 6 cards that many collections come with and sometimes it is hard to know exactly what to do with them.  I have found that they are great go to embellishments, they are simple, inexpensive and they can really dress up your pages!  Here I embellished the "made with love" card by adding the "family recipes" sticker over the top of the apron.  I added pop dots under the sticker to give the card some dimension and used the card as a pocket for a family recipe.  Here is a close up:

These pictures of my friend's daughter with her late grandmother will be a treasured keepsake for her album for years to come!  How wonderful to have this family recipe preserved! The only thing that would have made it better would have been had the late grandmother written the recipe down in her own handwriting instead of typing it. Just something to keep in mind next time you pass along a recipe, remember generations to come will cherish your hand writing no matter how "plain" or not attractive you think it is!  I also as you can see here used a pre-made border that came in the collection, so to dress it up and give it a bit of dimension I added gems and pearls to the center of the flowers!  Using embellishments you have in your stash to dress up the pre-made borders or cards is a great way to not only use up your stash but add dimension to your layouts quickly and easily!   I hope everyone is having a wonderful summer so far and will finds lots of time to get crafty during the rest of the "lazy" days of summer!  Happy crafting!


4 Comments »
Hazel & Ruby + Simply Stories = Beautiful Home Decor!

Monday, June 23, 2014

Brenda here, sharing a simple altered canvas.  I've had these Hazel & Ruby Stencils in my stash for awhile, and finally had an idea for a project to use them.

I started by spreading mod podge over a 12x12 canvas, then adhering one sheet of paper from the  Simple Stories Homespun collection with more mod podge.  One this dried, I laid out the letters for the words and brushed cream colored chalk paint over the entire surface of the canvas.  Then I removed the stencils to expose the patterned paper letters. 


I added a couple of small heart stickers and painted lightly over those.  Once all the paint was dry, I added some pen stitching to the letters.


The Hazel & Ruby masks were very easy to use, and they're reusable!   Besides the alphabet, they also have some cute images.  I hope you're inspired to get out the paint and try some masking on your own!


6 Comments »

Project Life Inspiration With Simple Stories

Friday, June 13, 2014

 Hi there everyone, Jeaunes here today with another Project Life Inspired project.  


Today I want to share with you a double page a made with pictures taken at Jonathan's newborn photoshoot.  He was only 6 days old in these photos.  The pictures I used on this page are some of my favourites from that day.  I just love the blue blanket and the white and red hats really looked stunning with the blue. 


I used the Homespun collection from Simple Stories for this page.  I loved the colours in the range and just love how the papers complement the pictures.  Here are some pictures of the detail.  


For all the pockets I used papers from the Homespun collection.  I included stickers and chipboard elements on the cards as embellishments.  I also used some photo-overlays to add some dimension to the photos and the one card I used Tim Holtz distress stains to decorate the white cardstock. 

This is really an awesome range from Simple Stories and once again so versatile! 

All of the products I used is available in the Frosted Designs store.  Don't forget to head on over to the store and fill those shopping carts!!!! 


2 Comments »

"Homespun" Gratitude Projects for Teacher Appreciation Week!!!

Saturday, May 17, 2014

Hello out there to all my crafty friends!!!  Brandi here with you today. We celebrated Teacher Appreciation week earlier this month and I made quite a few things to show my gratitude!!!  My daughter's teacher is absolutely amazing and it has truly been a pleasure working with her this year!  I can only hope that each year will be the same :-)

Altered Mason Jar 
Aside from sending in some standard school supplies that were needed in the classroom, I made some items sure to put a smile on the teacher's face!  She's a fan of Starburst candies and gum.  I had a mason jar lying around that was begging for some attention so I decided to put it to good use!
Here's a look at the finished jar with the Starburst candies inside:


I used the Simple Stories "Homespun" collection from the Frosted Designs Store for most of the projects.  I just love the patterns and colors!  I cut some strips, inked the edges, and wrapped them around the jar.
I created the sentiment in Powerpoint, printed it in red ink, then attached it to the top of one of the doilies in the die-cut pack.  I used pop-dots to add it to the front of the jar for dimension!

I finished the jar with a couple more pieces of paper and some red twine!


See how sweet life can be?!?!  Hahaha!!!!


 "Exploding" Box!!!
The next project was a very simple "exploding box" that I found while browsing the web for ideas!  I didn't have any directions but it looked pretty self-explanatory!


I started by cutting down a piece of cardstock to 9x9.  I scored it at 3 and 6 inches (3 inches for the center and sides!), then turned it 90 degrees and did the same!  Then, I cut off the four "outside" squares to leave just the center of the box and four side.  I taped some gum packs to the sides, then folded it up!

For the lid, I cut a piece of cardstock to 4x4 inches, then scored at one-half inch and 3.5 inches (this gives you a three inch center and half inch for all the sides!).  Then, just as I did for the box, I turned the paper 90 degrees and did the same.  There you have it!!  Easy as that!!! 


Now once the lid is removed, the sides fall out to show the wonderful goodies on the inside!!  Sweet!!!!


 Chalkboard Canvas Board
Now, the last project...  Yes, I really did save the best project for last!!  I created a wall hanging for the teacher to add to her wall décor in the class! 
Here's a look:


I LOVE it!!!  This took some time to do only because I had to wait for the paint and other mediums to dry over and over again.  Patience is not my strong suit when crafting so this was a challenge for me!!!!  Hahahaha!!!! 
I started by priming my canvas board with gesso, then adding several coats of Chalkboard paint (having to wait for them to dry in between!).


After drying was complete, I used the white uni-ball pen in store to create hand-drawn borders around the canvas.   

I mixed up some Luminarte Paint in "Wild Rose" and molding paste to create a colored texture for the canvas.  I used the "Live, Love, Laugh" stencil in the "Simply Sweet" kit from Frosted Designs and added my mixture over top!  Once that was dry, I outlined it with the white uni-ball pen for added detail.

I created other colors of molding paste using Lindy's Stamp Gang Magicals to create the flower stem and butterfly.  Using my hot glue gun, I attached a Kaisercraft bloom (pink) to the top of the flower stem for a 3D effect!!  Love it!!!


While everything was drying, I used my Cricut Explore to create a stencil of the teacher's name.  Then I carefully traced inside the stencil lines with the same white pen to finish the piece!!!

 
There you have it!!!  A multitude of gifts to show a small token of my appreciation for such an amazing teacher!!!  God bless her and all the wonderful teachers in this world!!! 
Well gang...  Thanks so much for stopping in and have a LUCKY day :-)


Products used from the Frosted Designs Store:


4 Comments »