Showing posts with label Hazel & Ruby. Show all posts

Joni is Mixing it Up!

Friday, August 22, 2014

I'm so thrilled to be back in the swing of things....I had a rather unfortunate situation that left me unable to scrap for a time.... 6 weeks to be exact!!!    My husband, myself and son were in a car accident on July 10th.  My son (he's 10) only had minor bruises (praise God!) -- and my husband had some bruises and a broken leg.  Now, somehow I got the worst of it...I had the same chest and stomach bruises from the seatbelts as my ds and dh....but I also got my legs jammed under the dashboard so I had some leg injuries and my right knee required surgery.  I also had a fracture to one of my vertebrae and a broken rib.  But the real crazy injury is that I broke BOTH HANDS (right hand required surgery).  I was holding a piece of paper in front of me when the impact occured, so we think the airbag hit my hands. But...now it's 6 weeks later and I'm doing better and have been able to scrap again (I'm calling it therapy...not only for my mind, but also for my hands!!)

Sorry for the long explanation.... today I wanted to share some layouts using our Frosted Design kits intermixed.  I love that they can so easily coordinate with each other!!

So, when the accident happened, I already had started some layouts using the July "Enchanted" kit.
These first two below also use the wood plaques from the previous "Capture the Moment" kit and are actually size 9x9 and are for a friend's baby book.

After I used part of the background paper, I wanted to use the "rest" of it on the second page, but didn't have quite enough.  So, I used a piece of blue paper in the center, and used the stencil and some paint to make the transition between the upper and lower pieces. 
Note on the Nana layout, the fairy above the flower is from the newest kit "Summer's End".


This next one was halfway done using the "Enchanted" kit, but I just couldn't figure out how to finish it up.
Then when I sat down with the "Summer's End" kit, I knew the flowers, wood & metal embellishments were the perfect final touches!!


And this last one, I started with the "Summer's End" kit but also used a few other items from the store.
I used the embossing powder from the "Enchanted" kit - it blends in with the blue mist, but it's a subtle accent.   (Thanks to my son for spritzing the mist for me..I don't quite have the hand strength to do that yet!)  I also used the Hazel and Ruby Mask Alphas (ERUPTION) and outlined the negative space with a Glaze Pen.


9 Comments »

The Deconstructed Layout - A Travel Book!

Wednesday, July 23, 2014

Hi everyone, it's Anita here today with another Deconstructed Layout. 


I have used some more of the Capture The Moment kit- I love this kit!!
They are on sale in the shop right now- be sure to stop by and pick one up!

I decided I wanted to make a travel book, making one page for every trip the hubs and I  have ever
taken together. The problem is,, way back in the day we didn't have cameras like we do now! 
There are a lot of  trips where I have no photos, but I can Google with the best of them!

So I made a list of all the trips I have no photos for and started looking. 
I searched Google images and found some great graphics for most of 
the things I needed. 

Our very first trip was to Long Beach, CA to see the Spruce Goose and Queen Mary. 
I found some postcards (non-royalty) for my page! I printed them out on heavy cardstock and 
trimmed them to the size I needed.

The album I am using is 6x8- and I want to put a LOT of ages in it, so thin pages are a must.

To get the layers I like so much but still keep the page thin, I used several
of the tags from the Capture the Moment Kit and layered then behind my photos. 
I also added layers on top of my photos- here I used one of the Prima Lace Stickers.

On this photo I stamped right on top of it using the Elle's Studios Everyday Moments stamp set.
I stamped in white in first, then black ink to give it more depth.

Brads and die cut stickers round out the rest of the layout. by using these flat 
elements, I was able to pack a lot onto this little layout!

Be sure to stop by the store and see all the wonderful goodness that Barb has for offer!
Thanks so much for stopping by today!
Have a wonderful day!!


3 Comments »

The Deconstructed Layout with Anita!

Wednesday, July 9, 2014

Hi everyone, it's Anita here today with another
Deconstructed Layout tutorial.


I hope you have been enjoying this series and I would love to hear your feedback!

Today I an using the Capture The Moment kit and some fabulous papers from 7 Dot Studios papers and I love them! Be sure to hop over to the store to see the whole line- you will swoon I promise! 

Here is a look at my layout
I don't normally use these colors, but the Nature Walk papers by 7 Dot Studios were just so beautiful!

 I started by using a craft knife to trim around the design on this paper. I wanted the emblem to show on the finished page so I trimmed around it and tucked the second layer underneath it.


To create my background, I used the Prima stamps included in the Capture the Moment kit, they were perfect for my project. I arranged all of the stamps onto a block at the same time, then stamped all over the background paper. I was not overly concerned with putting them in a perfect pattern- I just wanted to cover the page.

I wanted a little more dimension on the second layer,  so I used  stencil and some metallic paint. 

I love the die cuts that are part of the line- I layered some on and around the photos. 

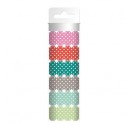
Along the side of the layout I added washi tape from Hazel & Ruby and then layered die cut stickers from the Nature Walk  Complete Collection Kit. I trimmed the edges of some of them for texture.

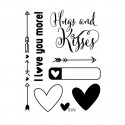
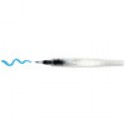
I fussy cut the butterflies and flowers, then used watercolor paints and my Koi Water Brush to add a little bit of color.  The Moments sticker is from Prima and is included in the kit. The arrow stamps are from the Love You More Set.

All these embellishments are from the kit- I love how they all work together!


Thanks so much for stopping by today!


5 Comments »

Hazel & Ruby + Simply Stories = Beautiful Home Decor!

Monday, June 23, 2014

Brenda here, sharing a simple altered canvas.  I've had these Hazel & Ruby Stencils in my stash for awhile, and finally had an idea for a project to use them.

I started by spreading mod podge over a 12x12 canvas, then adhering one sheet of paper from the  Simple Stories Homespun collection with more mod podge.  One this dried, I laid out the letters for the words and brushed cream colored chalk paint over the entire surface of the canvas.  Then I removed the stencils to expose the patterned paper letters. 


I added a couple of small heart stickers and painted lightly over those.  Once all the paint was dry, I added some pen stitching to the letters.


The Hazel & Ruby masks were very easy to use, and they're reusable!   Besides the alphabet, they also have some cute images.  I hope you're inspired to get out the paint and try some masking on your own!


6 Comments »

Layout Inspiration from Joni using Capture the Moment!

Thursday, June 19, 2014

Hi, it's Joni here today sharing a couple layouts I've created with the June Capture the Moment kit. But before I get to that, check out the ONE DAY DEAL in the Frosted Designs Store!


If you love Studio Calico and Pink Paislee… now is the time to stock up! But you better get your order in early! Once these items are gone, they are gone! This offer is good TODAY ONLY!
____________________________________________________________________________

I have to be quite honest...I LOVE the colors...maroons, browns, black and cream....but the patterns (vintage) are really not quite my style.  But, I love trying new things and challenging myself, so that's the mindset that I approached this kit with.

This first layout was a perfect opportunity to scrap my husband's Aunt that we visited last summer when we went "home".  I used Prima Time Traveler -The Traveler  paper as my background.  I also changed the card inside the pocket from the kraft one it came with to a piece of patterned paper.  I also used strips of patterned paper to decorate the front of the pocket not covered by the wood plaque.


On this wood plaque, I started by using the Prima flower Stamp for a light design on the top left and lower right of the plaque.  Then I created the heart by using the stencil and blocking off 2 of the hearts with scrap cardstock paper, so I only had 1 heart showing.

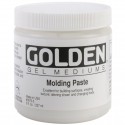
 I then used modeling paste to put the heart design onto the wood.  While it was still tacky, I stamped the lower left (Anywhere) so it overlapped a little into the heart and I used another stamp (Ticket) to make the larger impression that is just to the left of the flower.  I added the Ranger Liquid Pearls to make the black outline.  I then added the red Ranger mist by dripping it into the heart and let it set up in the grooves (and the black outline held it in).  I also spritzed the entire heart with the mist as well.  Added a bit of the trim and a flower from the kit and a bit of twine from my stash.


For me, I find that family photos seem to work well when I have vintage patterns, so I choose a family shot for this layout.  The background is Prima Time Traveler - No. 70 paper and the elements to the left and right are the ATC cards.  The paper that hold the "Family" title which is also an element along the top is Authentique Abroad paper.  A tag, flowers, brads, trim, enamel dots are all from the kit.


I used one of the Maya pockets here, but I used it untraditionally.  I unfolded the pocket (and cut it up) and used it behind my photo.


Now, I really wanted to stretch myself and NOT create a vintage layout.  I liked the little ticket and brad that said "Let's Travel", so I went through vacation photos and realized that I never told the story behind these photos.  I used the stencil (diamonds) from the March Beauty of Nature kit along with some Lindy's Magicals mixed into my modeling paste.   I cut banner designs in the paper and then clipped off a few pieces in the same pattern and added them to create a chevron look that supports my "looking up" theme.

The "Today" and " Like" frames are from my stash but since they are also Maya Road, they match perfectly.


I used one of the Maya cards without the pocket, but I didn't want to use "their" journaling lines, so I just cut a piece of kraft cardstock the same size and layered it on top with my title some trim and a brad.


I also added some stamped elements to finish it off.


My journaling: 
(Today frame):  Driving Down the Las Vegas Strip
TITLE: Memories from the Sun Roof
(Like frame): Great view of the awesome hotels...until the bicycle cop came by and made you get back in the car.


And my last (but favorite) layout using this kit is another "non-vintage" layout!!  

I was just feeling nostalgic when I did this one, so I focused on the word "Moments" from the Lace words...I decided that I would put that title directly on my photo.  I layered a few of the sheets of paper and mounted the photo on one of the wooden plaques where I inked the wood & some of the trim. 


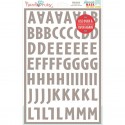
I then wanted to add the Title of "Cherish" ... so I decided to try the new Hazel and Ruby mask letters from the store...you can use them OVER AND OVER again...LOVE that!!   See the product list at the bottom of this post to see the letters I'm talking about!!  
So, I put them on, misted with the Red Ranger mist...then removed the mask (letters) and outlined with black pen.  I decided to also add the Lace word "Life" right on top of the word Cherish.

And some of the burlap flowers, brads, number circles and some designs I made with the Pearl Accents.


So my point today is that even if something (like a kit) isn't necessarily your style, you should embrace the challenge and see what you can do with it.  If you always scrap things that you consider "your style" you may never discover that you have a wider range than you originally thought!!!


2 Comments »