Showing posts with label Glitz. Show all posts

Pretty Paper + Sketches = 8 FABULOUS cards!

Saturday, July 19, 2014


Hello everybody!
I am thrilled to be part of this wonderful team, and I am so excited to share my first project with you...

My name is Solange, but some of you may know me with my online name "Isbaha". I am a 36 years old stay-at-home mother to three boys (2-4-6 years old) and I live in a tiny French village.
I love everything with paper : mini albums, layouts, cards, tags, boxes... but if I had to choose only one, it might be anything that you can offer ! I enjoy everything homemade, especially embellishments, and I try to share what I know with tutorials.

So now, let's see my project for today... Here is a tutorial for creating a set of 8 cards from only 12 patterned papers (6x6) and 3 cardstocks (12x12)! Almost no leftovers here...
Need to have some greeting cards ahead (Christmas in July, anyone?) or maybe some all-occasions cards available? This tutorial also works great for making a set of cards to offer, and... You will finally use some of these cute 6x6 paper pads!

To show you how versatile this tutorial is, I made three sets of cards.
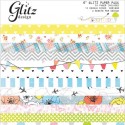
The first one uses the brand new Glitz paper pad "Brightside" and has a modern look:


 See larger pictures of the cards on Snapguide:


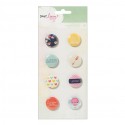
Don't you think that the flairs from the Lucky Charm collection match the color palette of the Glitz papers in a nice way?
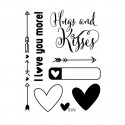
And look at this stamp set by Elle's Studio: I bought it because of the sentiment (it looks really great on the cards), but my favorite stamps are the hearts, they look fabulous when layered (black ink for the outlined heart and colored ink for the solid heart)! 
I used pop dots for some of them. The sentiment is embossed with white embossing powder.


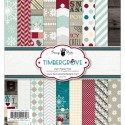
The second set of cards uses a Fancy Pants winter paper pad "Timbergrove" (and good news, it's on sale!), and the look is more traditionnal:


See larger pictures of the cards on Snapguide:

How to Create 8 Cards With 12 Papers (6*6): Set 2

For this set of cards, I wanted a more distressed look, so I decided to play with my brand new Magicals by Lindy's Stamp Gang.

These powders are supposed to be mixed with a medium before using them, but I plan to keep them in their powder form and to only mix the needed amount with different mediums when I want. This color palette is right up my alley, so I figured that I would have many uses for them!
So this time, I decided to mix my Magicals with my embossing powders.

First, I mixed some white embossing powder with clear embossing powder: it gives an interesting distressed look to the final result, because some of the pattern is white, and some is clear BUT it can't be colored because of the clear embossing, so you can see the color of the background.
(Note: mix only the needed amount of powder in case you don't like the look!)
Then, I added just a little of Time Travel Time Magicals powder and I mixed it carefully.

Even when heat embossing, there is not enough wet to make the Magicals react and color the embossing powder, but here is what I discovered: if you rub on the embossed stamping, then, the color appears, like by magic! You can use a very-very slightly wet wipe (be careful, the more wet you use, the more "painted" look you have!) or just your finger for a subtler look.

Finally, I added shadows with a brown pen, to highlight my sentiment. I am so excited to try my Magicals with other mediums and see what happens!
(For information, my sentiment means "Season's greetings" in french).


Finally, the last set of cards  uses leftovers of one of my all-time favorite 12x12 paper pack by Simple Stories: "Vintage Bliss" (this one is on sale too!), so I had to be a litlte more creative to make the cutting diagrams fit my leftovers, but it worked. 
Now, I can see more cards with my leftovers and this tutorial in my future!


See larger pictures of the cards on Snapguide:

Check out How to Create 8 Cards With 12 Papers (6*6): Set 1 by Solange Jacquet on Snapguide.

In my sample above, I used homemade paper bows to embellish most of my cards, and I cut them from the leftovers. See a tutorial for making these paper bows (without any die) here: http://scrapyourscraps.blogspot.fr/2014/05/paper-die-cuts-paper-bows.html.

Or of course, you can use any other embellishments!


TUTORIAL

1. Choose 3 cardstocks (12x12) in neutral color and cut 8 cards (6x4). The remaining cardstock will be used to stamp the sentiments, add borders or make embellishments. Note that the card F also uses a (3-7/8 x 5-7/8) cardstock background.

2. Choose 12 patterned papers (6 patterns twice) from a 6x6 paper pad. See instructions about how to choose the patterns according to the cutting diagrams on the Snapguide.


3. Cut all the pieces following the cutting diagrams: don't forget to write the cardsketch letter on each piece (on the side you're not going to use)!

4. Gather all the patterned paper pieces for each sketch (looking at the letter on each piece) and put the cards together. Here are the sketches:


5. Using the remaining patterned paper, make your own embellishments and/or add embellishments from your stash.

6. The card F mainly uses paper strips onto a cardstock background (3-7/8 x 5-7/8), so leftovers are perfect for that, they are not included in the cutting diagrams.

I hope you enjoyed this tutorial, and please, let me know if you used it!


7 Comments »

Welcome our Newest Designer - Megan!

Monday, April 14, 2014

We are thrilled to welcome a new Designer into the Frosted Designs Family! Megan is super talented and is joining our team! You can read a little bit about her today as she shares her first project with us! 


Hello! My name is Megan and I recently moved from Portland, Oregon to Milwaukee, Wisconsin with my husband of almost ten years, Andrew, our two-year-old son, Liam, and our one-year-old golden retriever, Scout. The move was truly bittersweet as we fell in love with the Pacific Northwest and enjoyed our six years in Portland, but decided that for the sake of our son, it was more important to move back to the midwest to be close to family. Before getting the best job ever – being a stay-at-home-mom – I worked for a private dental practice as the office manager and was in advertising account services before that. 

I am an avid scrapper and have been scrapping in one form or another since high school. I turned to scrapping because I had so many pictures lying around as photography was my first artful passion and I wanted to do more with them than just shove them into basic photo albums. If you asked me to describe my scrapbooking style it would be “clean and linear with a little eclectic flair.” I truly love preserving our family history for years to come and also watching the smiles on my family and friends faces as they flip through my scrapbooks. 

Besides scrapping and photography, I enjoy hiking, skiing, camping, eating lots of good food, and listening to music and NPR.


 I am so excited to be sharing my first creations as a member of the Frosted Designs Team! I am thrilled to join such a wonderful group of ladies and grateful to Barb for giving me this opportunity!

So, onto my first reveal! When I saw the Glitz 77 collection in the store, I fell in love. See, I was born a couple decades too late. I am a huge fan of the 60s and 70s - the music, the culture, the history - and the 77 collection does an amazing job of capturing that 70s spirit but with a modern twist. The colors, patterns and various elements in the collection are amazing and it can really be used to scrap any topic. I have it planned for a couple travel layouts, some everyday moment layouts and it will probably show up among my Project Life spreads too since it comes with lots of sentiment stickers and a sheet of fun 4x6 and 3x4 cards.

First, I am sharing a travel layout with you. When I laid eyes on the puffy stickers and saw that old school VW van and the sentiment sticker with the title from one of my favorite Fleetwood Mac songs, I knew right away what my layout would be. It's a sort of "photo essay" of our cross-country road trip as we just moved from Oregon to Wisconsin. You'll learn quickly that I take lots of photos so I have a tendency to gravitate towards multi-photo layouts...

And here are some closeups featuring the fun embellishments found in this collection. I am totally in love with the puffy stickers and those big rhinestones! I also happened to pick up the Studio Calico Printshop heart wood veneers and thought they went perfectly with all the hearts found in the 77 collection...

And, because I just couldn't put this collection down, I have a second layout to share with you all! I love this shot of my husband and son taken during a recent family portrait session and when I saw the quote from John Lennon's Imagine, I knew I wanted to use it on a page with this photo. For this layout, I decided to take the orange found in the collection out of the equation altogether and I love the way the black, white, gray, teal and gold play together - especially with the black and white photo.

Now for some closeups! Again, I couldn't get enough of the puffy stickers and used three of them to create a visual triangle. And, of course, I had to include one of the giant rhinestones. Also, the Kaisercraft mini blooms in sea breeze matched this collection perfectly, so I added one of those for a little texture.

There you go! My first Frosted Designs reveal! Now, head on over to the store to pick up the Glitz 77 collection and lots of other fun new goodies!


Products used from the Frosted Designs store:

4 Comments »