Showing posts with label Heidi Swapp. Show all posts

Altered Tin with Spring Gardens Kit with Brandi!!!!

Wednesday, April 22, 2015

Hello everyone!!!  Brandi here today with an altered tin I made using this month's fabulous "Spring Gardens Kit"!

Here's a look:


My husband gave me a hot tea tin he had and I knew it would be a perfect project (so did he!!!). I wrapped the tin with the beautiful papers, then started to embellish!
I used the trim from the kit, one of the wooden frames, a quote from last month's kit, and one of the resin butterflies for the front!

Here's a close-up of the butterfly.  I used ink from a previous kit to add a small amount of color!


I used one of the wooden Kaisercraft balloons and several of the flowers for the top!  I also used ink from past kits to add some color to the all white flowers :-)


 As you can see, I wrapped the trim around the entire tin!


 Here's a view from the top!

Well gang...  Thanks so much for stopping in and have a LUCKY day :-)


6 Comments »

Tutorial Tuesday with Brandi: How to Create a Pocket Mini Album!!!

Tuesday, April 14, 2015

Hello again crafters!  It's Brandi here today with a quick and easy tutorial on making a simple pocket mini album using this month's "Spring Gardens" kit for your favorite photos, sayings, inspirational quotes, etc.

Here's a look at the completed album:


And here's the tutorial:

Check out How to Create a Pocket Mini Album by Brandi Matos on Snapguide.

Well gang....  Thanks so much for stopping in and have a LUCKY day :-)

5 Comments »

Mixed Media Canvas with Channa!

Wednesday, August 27, 2014

Good morning all, 

Channa here, and today i am sharing a mixed media canvas for you. 
I was ready to play around and get messy and see below how it turned out:


I used one sheet of paper of the 7 dots, Cold country collection pack. Together with some embellishments, such as flowers, chipboards & stamps from my own stash i created this canvas. 
Normally i always start a project with an idea in my mind but this one was completely free style. 


Thats the nice part of mixed media, just use whatever you can find on your desk and start playing around. 
I made several layers starting from paint, paper, gesso, modeling paste, sprays etc...


Thank you for passing by and have a great day!


Products used from the Frosted designs shop:


3 Comments »

Hello Sunshine Altered Mini Album and Tutorial with Solange!

Monday, August 18, 2014

Hello everybody!

Today, I wanted to share with you my favorite way to make my own mini album foundation.
I use it all the time because it's very sturdy, and the result looks so great! You can adapt it to your own style once you have the base.

It's not that difficult if you have the tools: PVA glue or any strong liquid glue that you can spread out thinly with a roller, and chipboard (I buy mine in craft stores, but if you really haven't anything else, you can try with cereal cardboard).


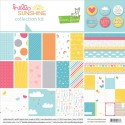
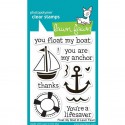
For my mini album, I mostly used Hello Sunshine papers and Float my Boat stamps by Lawn Fawn.

The anchor is heat-embossed with silver powder (and then fussy cut and tied with yellow twine).
The title "2014" uses the lifebuoy as a "zero".
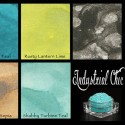
The word "été" means "summer" and I die-cut it in a cardstock that I painted with my Magicals (I mixed some "Shabby Turbine Teal" powder with white paint and some water and that's all!). The result is so shiny, I love it! You couldn't guess that it was only basic cardstock.
On the back of the cover, I added a stamp by Elle's Studio for the place of our vacations.


I love that my Magicals can be used in so many ways! I chose my favorite color palette ("Industrial Chic") because I was sure I would have a lots of uses for it.
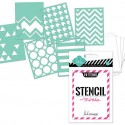
I keep them in their powder form and only mix some of it with the needed medium: this way, I can have either a spray ink (I used some "Time Travel Teal" color with an Heidi Swapp chevrons stencil), a paint (I used some "Shabby Turbine Teal" with an Heidi Swapp triangle stencil on clear plastic sheet), or anything else I fancy!

I think that stamps are a great way to embellish an album, because they help to bring unity by using them all over the album: I used the boat that I paper-pieced and mounted on foam, the anchor that I heat-embossed with silver powder, the arrows on my tags, and the hearts (tiny and medium) here and there to add a contrasting touch.
Did you notice? My "lace" border is actually stamped by repeating the wave stamp!


So now, let's see how to make your own mini album foundation! (Click on the pictures to see them larger).

Here are the supplies you need:
- PVA glue + heavy thread
- chipboard:
6-1/4 x 6-1/4 (2 pieces)
3/4 x 6-1/4 (1 piece = spine)
- Patterned paper for the cover (outside):
6-1/2 x 7-1/2 (2 pieces)
2-1/2 x 7-1/2 (1 piece)
- Patterned paper for the inside:
6 x 6 (2 pieces)
2-1/2 x 6 (1 piece)
- cardstock sheets:
6 x 12 (4 pieces) fold at 3" and 9"
3/4 x 6 (1 piece = spine)
- clear plastic sheet: 5-3/4 x 6 (2 pieces)

I also used 2 eyelets and some ribbon to close my mini album, but you can do without.


Step 1: the cover

Using liquid PVA glue and a roller to spread it out, glue the chipboard pieces onto the patterned papers.
Start by gluing the chipboard spine: center it onto the patterned paper spine. Then glue the two chipboard pieces on each side, letting about 1/8" between each piece to allow the cover to close without tearing.
The patterned paper spine only covers a small part of the chipboard covers, so glue the 6-1/2 x 7-1/2 patterned paper pieces edge-to-edge to cover it all. You can add some ribbon or washi tape to embellish (or hide!) this edge-to-edge.


Then, cut each corner following a diagonale (don't flush cut but let about 1/8"), fold over and glue.

You can add two eyelets and two pieces of ribbon to close the album if you want.

Finally, glue the two 6 x 6 patterned papers inside, and then the 2-1/2 x 6 paper in the middle (overlapping the other papers). Carefully mark the folds with your finger and allow to dry.


Step 2: the inside pages

First, fold your cardstock pieces of paper (6 x 12) at 3" and at 9". You can use a border punch for the vertical sides if you want, but be careful to line them up!

Next, make holes on the paper spine like on the picture below. There are only two lines of 6 holes (spaced at 1" each) because you will sew two cardstocks on the same line.

Then, sew each of the 4 pieces of cardstock on the spine with a heavy thread. To make things easier, you should first make holes on the cardstock pages. The sewing is the most difficult part...


Using double face adhesive, stick the clear plastic sheets between the flaps. That's why it was important to make the punched borders lined up!


Finally, glue the paper spine (with the sewed pages) onto the cover spine. Don't forget to carefully press the spine onto the cover for a perfect result.


And here is my (almost) finished mini album, ready to receive my vacation photos (that I am hopefully taking right now, as this post is scheduled!):


This album is also great to offer because it mostly uses standard photos (8 (6x4) photos and only 4 (3x4) photos). I think that the color palette and the sailor theme is also nice for a baby boy album!


You could also not stick the photos and make the tags removable to add more photos or more journaling.
I hope you enjoyed this tutorial, and please, don't forget to share your take on it if you use it!


Products used from the Frosted Designs Store:


3 Comments »

"Hello Today" layout with Megan!

Saturday, August 16, 2014

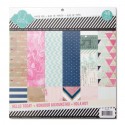
Hello all! Megan here with you today on this wonderful Saturday exactly halfway through August! That's right...we are halfway through the last true month of summer. Seriously, where did the time go? So today, I am holding onto summer with a tight grip as I share two sunny, fun, summery layouts I created using the gorgeous Heidi Swapp Hello Today collection. Although this collection would be great for scrapping just about any topic, it was the shades of blue and green mixed with pops of bright color then all pulled together with a sandy kraft neutral that made me think of the beach. So I sought out photos with sand, water and sky!

My first layout features a photo of my parents taken last August at Cannon Beach, Oregon when they came for a visit. I purposely used the American Crafts yellow cardstock to anchor my photo and help it stand out more against all the fun patterned paper. Every sheet of paper in this collection is awesome and I had such a tough time deciding which ones to use first. I also have the "hoard it" syndrome and don't like to use my favorites right away. Luckily, this paper pad comes with two sheets of each design so I was able to use one sheet of my favorite patterns, the multi-colored stripe and the arrows on kraft, and hoard the other sheets for later. This is also the first project I've used the new Prima wire thread on (here I just used a bit to detail my pink button) and I have to say it is a fun product and I'm looking forward to playing with it more in the future!
My second layout is a new favorite not only because of the awesome products used, but because of how special these photos are. We have been living with my in-laws for almost six months while we've been house-hunting for a new home. Although it can get tight at times, moments like the ones in these photos would be harder to come by if we weren't all living together right now. My father-in-law loves taking Liam for walks, especially down to Big Bay Park nearby. This day, I tagged along and managed to hang back and snap these photos. I had lots of fun creating the wonky photo mat of paper strips behind the photos on this layout. I also really love the fun sequin rub-ons in this collection and used them here in sort of a cascading affect down and across the page. Another detail I wanted to point out is that I inked all the edges of the all the papers on this page because this collection does have a lot of white in it and I didn't want all the different papers' white areas to "bleed" together. 

And here are a few closeups of these two layouts so you can get a better sense of exactly how funky and fun these products are!

I hope these bright, summery layouts have inspired you to get out and enjoy the last couple weeks of summer! But, before you rush out the door, be sure to swing by the Frosted Designs store to stock up on some Hello Today goodies for yourself so you can document all your fun memories when the cool weather hits!

Products used from the Frosted Designs Store:

4 Comments »