Showing posts with label Love is in the Air. Show all posts

Scrapping Heritage Photos with Lori!

Thursday, July 3, 2014


This is a picture of my mom around age 3.  Her mom gave her a home perm and then decided she did not like it - so she cut it off.  My mother hated this picture because of her hair.  This photo hung in the hallway of my grandparents home until they passed away 13 years ago.  My mom passed away in 1989 at the age of 46 and would probably not be thrilled that I put her photo on such gorgeous paper!!!
I used everything from the Capture The Moments Kit except the heart frame, white flowers - both sprayed with gold Heidi Swap mist (Love is in the Air) and the metal butterflies (Beauty of Nature).
Here is a close up of the flowers and flair on the corner of the photo.

These photos are just gorgeous and perfect for your heritage photos!!!  Keep those stories alive!!!


 photo Lori_zpsea64f050.jpg

3 Comments »

Celebrating Our Graduate!

Friday, May 2, 2014

Happy Friday everyone! I had a few quite hours where I had the house completely to myself so I took advantage of that and started to play with some of the messy products sitting on my desk! I added in some of the items from Frosted Designs Kits and this is what I created!

Last May my daughter graduated from Evangel University and we couldn't be more proud! Even though the weather wasn't very Spring-like that day, I decided to make a Spring-Like layout!  :)

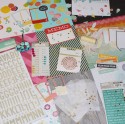
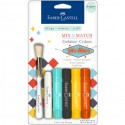
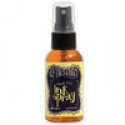
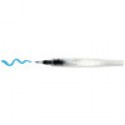
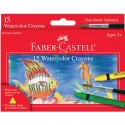
I had a lot of fun getting a little messy on this one! I started by spraying a little Dylusions Ink (Lemon Zest) on the background paper (which was in the Love is in the Air  kit). I then used my Koi Water Brush along with the Watercolor Crayons to add a little orange to the background. I love the water color look! Finally, I used the stencil (from the November Mixed Media Kit) and some Gelatos to create the blue circles!


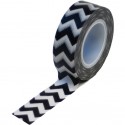
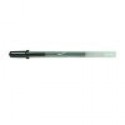
The patterned papers I layered behind the photo were from the Shades of Spring Kit. I outlined the edges of the patterned paper and scalloped frame on the photo with the Black Gelly Roll Pen! It is perfect for this! I LOVE the black chevron Trendy Tape from Queen & Co so I added that in a few places! Do you like the Studio Calico polaroid die cut? It is from the Sea Breeze Kit! Don't you love it when you have bits and pieces left from kits that you can use like this?!  :)

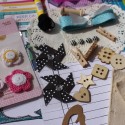
Finally I added a few extras down in the corner of the layout! I can't get enough of the Maya Road Vintage Metal Trinkets!


Tomorrow is National Scrapbooking Day! I hope you get some time to play and create! If you need supplies, you might want to check out the Sale going on in the Frosted Designs Store!


4 Comments »

Sundays with Sandee + Frosted Designs Kits = A Brand New Journal!

Friday, April 18, 2014

Hello everyone! Barb here to host the blog today! I don't know about you, but I absolutely love our Sundays with Sandee series! The woman never runs out of ideas and I LEARN sooooo much from her! I may not have time to try out every single thing, every single week but I am watching and learning! So… when it was time for me to make a journal, I decided to go review a few lessons and put them to practice! You are actually going to laugh when you see how many I used!! The other thing I used a lot of were the Frosted Designs Kits! I pulled a little out of this one, and a little out of that one, and then something from another one… you get the picture!! Isn't that the best part of getting kits?!

I like to have a little notebook that I take with me to church. This is my place to keep any sermon notes, bible verses or any other important words of wisdom so that I have them all in one place. Once I am home, I can look back over my sermon notes and also use it during my devotion time. That is what this little notebook is being used for.

So, here it is! The completed journal cover! I have to confess, this is my second attempt. The first one just wasn't working for me so I started a second one. My only regret on this one is that I didn't take photos each step of the way so you could see the madness to my thinking!! :)


I started with the Mixed Media Journal in the Frosted Designs Store. I love that it is wire bound and has plenty of pages! The size is perfect for fitting into my purse. I used the graph looking paper that was in the "Love is in the Air" Kit (Clean Fun) and cut it to the size of my journal cover. I did all of my work on the paper before I adhered it to the journal. That way I didn't have to worry about mists and paints getting on the journal where I didn't want it.


I started by creating the background using Lindy's Starburst Sprays & Sandee's Lesson #3 - Wax on or Wax off! I loved the way it created the soft blue background! But that was not enough! So, the next lesson I used was Lesson #4 - Going Dotty! I added dots with the Lindy's Starburst (using the dauber top), and stencils (from the November Mixed Media Kit & Shades of Spring Kit.) I also used the Tim Holtz Distress Paint Dauber (Juniper) in the Shades of Spring Kit! The stem of the flower was painted using the Lindy's Magicals that come in our current kit, Beauty of Nature. The Koi water brush was perfect for this!


My next step was to check out Sandee's Lesson #6 - Acrylic Pour and Ink Blots. I didn't actually pour the paint (other than a few splatters) but I liked the way Sandee used the Patterned Paper for her heart. As I was sitting there struggling to figure out what I wanted on the front of my journal (didn't want a cross or a heart) I decided to check out Lesson #8 - Mixing it up! The flower that Sandee had in that lesson inspired me to make the flower but I used patterned paper for mine. The red paper came from the Love is in the Air Kit. I cut out 3 hearts and layered them over each other. I then punched a circle from some paper in the Shades of Spring Kit. I folded the circle in half and used it to hold the "petals" of the flower together! I used the Black Gelly Roll Pen to outline everything.


Next it was time for the title. Everything in me wanted to grab some nice thick stickers to stick on and call it done… but I didn't! Instead, I added a title with the Black Gelly Roll pen and I hated it! It wasn't the handwriting that bothered me as much as it just got lost on the page! So… I grabbed the November Mixed Media Kit and cut out the Journal tag. It was the perfect size to cover up the title I didn't like! :) I then jumped into the next Sandee lesson, #23 - Bar Lettering. I added a few lines on each letter using the Tim Holtz Distress Marker that comes in the Beauty of Nature kit. Inspired by Sandee's Lesson #10 - Cut it Out, I cut the word "take" from the patterned papers in the October Mixed Media Kit. The sticker under the title came from that kit as well. The striped tape under "take" is from the Season of Stars Kit. I seriously love that tape… it ends up on many of my projects!

To finish off the cover, I added my favorite Bible verse in my own handwriting. Finally, I adhered the paper to the front of my journal and I was done! I am happy with the way the journal turned out and I am even more happy that I ventured outside my comfort zone to create it. That is also one of the things I am enjoying with the Frosted Designs kits… trying out all kinds of mixed media items and techniques! I am so thankful for all of the Sundays with Sandee Lessons that were available for me to learn from and the nudging from Lori (Telling Your Story Through Scrapbooking) to add handwriting to all of our projects!

I'm sorry my post was so long today but I hope it inspires other to get outside their box to try something new! I would love to see what you make! You can share it in our Facebook Group…. there are a lot of amazing ladies who hang out there and are super supportive! Have a great weekend!

*Did you know that you can get one of our 2013 kits for FREE when you sign up for a subscription! Just leave a note a checkout stating which kit you would like! If you have questions, send an email to barb@frosted-designs.com!


7 Comments »

Need a Title?! Lori Can Help!

Thursday, April 3, 2014


What is in a title?  Well, I know I have several titles:  Wife, Mom, Sister, Sister-in-Law, Daughter-in-Law, Aunt, Miss Lori, Friend, Neighbor, Baseball Mom, Cousin, Instructor - you get the picture!!  Each situation calls for a different title, just like each scrapbook layout (story) calls for a different title.  You need to ask yourself ~ How do you want to title your story?


Take any photo (or set of photos from one event) and you can use several different titles.  The title depends on how you want to tell the story of this/these photo(s).  If your photos need several pages to tell the story, only the first page needs a title.  Here is an example of several titles for a birthday layout:

If you can't think of a title that fits the photo or the space you have left on the layout, it is time to get out of your box!!

Titles can be long or short, funny or serious, borrowed or original.  Titles can be a single word or headline, a mini headline or a set of title and subtitle.  There are no rules, just guidelines!!
Titles can be quotes, movie or song titles, song lyrics, a question, or a play on words.  I find inspiration everywhere for titles:  Pinterest, TV, magazine articles, nursery rhymes, stores - you name it!  I keep a notepad with me for journaling notes and title notes because you never know where inspiration will hit!!!
The photo I am using today is a slefie of Tanner and I at Disney last fall while riding the Dumbo Ride.  He loves when we take selfies together!!
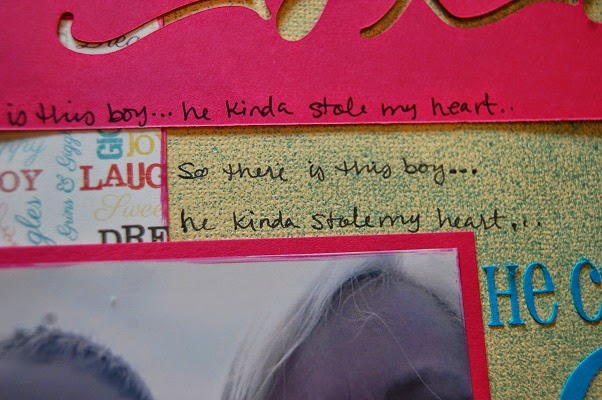
I had many thoughts about what my title could be for this layout - Selfie Buddies, Riding Dumbo (again), Best Day Ever, I adore his smile...I cherish his hugs...I admire his heart...but most of all.....I love that he is my son, and So there is this boy....he stole my heart....he calls me Mom.

Last month I posted about journaling and using your own handwriting on your layouts (HERE) and I wanted to add my handwriting to my title this month.  I chose the last option so I could handwrite everything except He Calls Me Mom.
For my layout today, I used Heidi Swapp Teal colorshine to color my background paper.  I used Home Tweet Home - Word Play doublesided paper from ADORNit ~from the Love is in the Air kit.  I cut two pieces to layer under my photo.  I used the flowers and Tim Holtz Picked Raspberry Distress Paint to paint the edges of my papers and photo from A Moment In Time kit.  I used Picked Raspberry Distressed Ink Pad from the Sades of Spring kit. I cut "He Calls Me Mom" and the xoxo border with my cameo.
I wrote my handwritten part on a scrap paper so I can make sure it will fit on my page.  I decided not to write it all on one line because it would stick out too far.  Instead I wrote each segment on a line.

I hope you find titles a little more fun after today!!  If you need some help or ideas on Handwriting, please check out Sandee's video Typography and Lettering!!
I encourage you to practice handwriting part of your titles.  Join us here on April 11th for my next challenge (handwriting is a big part of it plus some ink/mist of your choice)- I would LOVE to see your layouts or projects!!!


 photo Lori_zpsea64f050.jpg

4 Comments »