Showing posts with label Sea Breeze. Show all posts

Celebrating Our Graduate!

Friday, May 2, 2014

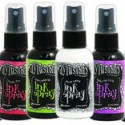
Happy Friday everyone! I had a few quite hours where I had the house completely to myself so I took advantage of that and started to play with some of the messy products sitting on my desk! I added in some of the items from Frosted Designs Kits and this is what I created!

Last May my daughter graduated from Evangel University and we couldn't be more proud! Even though the weather wasn't very Spring-like that day, I decided to make a Spring-Like layout!  :)

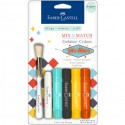
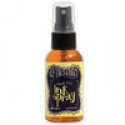
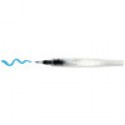
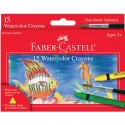
I had a lot of fun getting a little messy on this one! I started by spraying a little Dylusions Ink (Lemon Zest) on the background paper (which was in the Love is in the Air  kit). I then used my Koi Water Brush along with the Watercolor Crayons to add a little orange to the background. I love the water color look! Finally, I used the stencil (from the November Mixed Media Kit) and some Gelatos to create the blue circles!


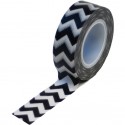
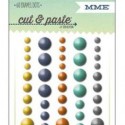
The patterned papers I layered behind the photo were from the Shades of Spring Kit. I outlined the edges of the patterned paper and scalloped frame on the photo with the Black Gelly Roll Pen! It is perfect for this! I LOVE the black chevron Trendy Tape from Queen & Co so I added that in a few places! Do you like the Studio Calico polaroid die cut? It is from the Sea Breeze Kit! Don't you love it when you have bits and pieces left from kits that you can use like this?!  :)

Finally I added a few extras down in the corner of the layout! I can't get enough of the Maya Road Vintage Metal Trinkets!


Tomorrow is National Scrapbooking Day! I hope you get some time to play and create! If you need supplies, you might want to check out the Sale going on in the Frosted Designs Store!


4 Comments »

Playing with Printshop!

Wednesday, January 15, 2014

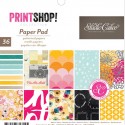
Happy Wednesday everyone! Barb here to share a few layouts I made with you! When I saw the Studio Calico Printshop Line, I knew we needed to sell it in the store! This line is awesome! The papers are so versatile that you can use them for almost any occasion! And with the mix of patterns, you can change up the styles between layouts. I completed two layouts with the same paper pad but you would never know it!


I love the fun, playful tone of this Silly x3 layout! I cut several of the patterned papers and then outlined them with a black pen. I also added some playful doodles! 

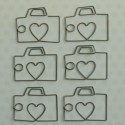
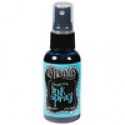
 How cute is that little camera? That came from the coordinating vellum die-cuts! So did the arrows ! I love them!! The striped Silly title at the bottom is from the Scripty Words Pack. I used Dylusions spray ink in Calypso Teal to add color to it!

Before I adhered the Silly title to the bottom of the page, I traced it two times with a black pen. I then used Gelatos to color the words in giving it an ombre look down the side of the layout!

 Here is the second layout I made! All of my kids know that their Grandpa is the man so sit by at night when watching TV! His favorite snack is Popcorn and Apples and there have been a lot of great memories made by sharing snacks with Grandpa! These papers are from the same Printshop Paper Pad!

 The Chipboard Letters came from the Frosted Designs Sea Breeze Scrapbooking Kit. The & sign is from the coordinating Printshop vellum Die-Cuts. Do you see the brown stripe on the paper above the banner?! I painted that on using our brand new Lindy's Stamp Gang Inks!

This was my first time working with Lindy's Products and I have to say….. I LOVE THEM!!! The colors are so amazing and I like that I can control the size of the "drips" by the way I spray! I also used the Magical Powder with a stencil to create the blue circles. (you can kind of see one peeking out from under the banner.) I will certainly be adding a few more colors to my collection very soon!! :)

I hope you have some creative time for yourself today!

Barb :)

5 Comments »

One last Look at the October Scrapbooking Kit!

Thursday, October 31, 2013

One of the things I like best about the October Scrapbooking Kit is it's ability to be so versatile!! It can be used to make stunning girly pages as well as standout guy pages!! We are releasing the November Kit tomorrow but we still have a few of our October Kit available! Look at what Joni did with her kit....


Wow...October sure flew by didn't it?   Joni here, and I wanted to share another layout I completed with the October Scrapbooking Kit named Sea Breeze.

This is my son and his cousin that hadn't seen each other for a while....
I painted the Thickers to match my themed colors and I love the die-cuts for accents on this...

I like how the journal spot turned out after I layered a couple of the Polaroid frames.


So...if you haven't subscribed to our monthly kits yet...what are you waiting for??


2 Comments »

More October Scrapbooking Inspiration and a Tutorial!

Monday, October 14, 2013


Hi Manda here and today I want to share a quick tutorial with you for a trend that is really hot right now... Feathers. The first layout I made with the Sea Breeze kit was a page about a Magpie that comes and visits our garden. I loved the feathers in the Studio Calico ephemera back but they weren't quite big enough to give my layout the impact that I wanted so I decided to use some of the lovely patterned to create my own. 
1. First I cut out feather shapes from the paper. I did these freehand but if you are a bit unsure you can draw the shape you want on the back of the paper you are using.
 2. Next take the feathers stitch up the centre with your sewing machine. I haven't tried it using hand stitching but I don't see why it couldn't be done, infact it would be a great way to add a pop of colour.

 3. Next I took my paper scissors and carefully cut in towards the centre. It is very IMPORTANT that you do not cut all the way to the thread because you may snip the stitching or if you leave the centre bit too thin it could fall apart.
 4. Once I finished cutting both sides I carefully "ruffled" them. You need to do this very carefully as you could tear the centre stip of paper and the whole thing will fall apart. 
5. This is the finished product and below you can see how I used them on a page. 
Hope you enjoyed this tutorial and if you have any questions please leave them in the comments and I will answer them the best I can. Have a great day!


Follow on Bloglovin

5 Comments »

Manda's October Scrapbooking Kit Reveal

Sunday, October 13, 2013


Hello, Manda here and today I want to share some of the creations I have made using the
October Kit - "Sea Breeze"
The second I opened my box of goodies I was in love. I really liked the mix of colours and embellishments and that they could be used to make projects that all look very different. So far I have made two layouts and two cards but I have lots of goodies left over and will be making more.

The colours were perfect for my Magpie layout and I used some of the patterned paper to make some custom feather embellishments.
As you can see my second layout is completely different and that is something that is really important to me in a kit, I don't want everything to be so much the same that all my pages look identical.
For the leftover paper on those two layouts I made a couple of cards and again they couldn't look more different. I had so much fun playing with this kit and cannot wait to see what the girls put together next.
Don't forget that these kits are limited, limited and once they are gone they are gone. So why don't you pop over to Frosted Design store today and grab one, before you miss out.....

4 Comments »

October Scrapbooking Kit... Project Inspiration

Good Sunday Morning Everyone! It's Barb and I am hosting the blog today!  I had a day completely to myself yesterday, (I know... so exciting!!) so guess what I did... I went to my studio and pulled out the Frosted Designs October Scrapbooking Kit! Yay!!!


I thought I would share the projects I created with the kit but first I wanted to talk to you about our thought process when putting together this kit. When I purchase kits, there are certain things I want in a kit...

1. I want a kit that will work for everyone in my family. That means it has to be diverse enough in it's contents that I can make a layout for my son, daughter & family in general.

2. I want a kit that mixes different manufacturers so that I don't have to. Sometimes the manufacturer kits that have everything included are nice, but a little too matchy, matchy for me. I want a kit that will allow me to sit at my desk, pull out all the contents and start creating. No searching for matching papers or embellishments... it is all in the kit already!

3. I want a kit that is a good value... one that I can create several projects with.

I believe that the Frosted Designs Scrapbooking Kits have all of these things!

ALL of these projects were made with the Frosted Designs October Scrapbooking Kit. The only things I added were items I already had in my studio like inks, molding paste & mists.

This layout was made mostly with the Glitz papers in the kit. I used the Sketchabilities Sketch found here.

Since it was taken at a Diamondbacks Baseball Game, I wanted to include the tickets from the game in the layout.


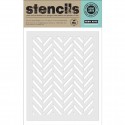
I used the Hero Arts Herringbone Stencil (you can find it in our store) for a fun design in my background. Once it was dry, I sprayed on some Dylusions Ink Spray in Calypso Teal and White Linen.

I love these little word stickers from My Mind's Eye that are in the kit... so fun! The triangles are from the package of Studio Calico Die Cuts.

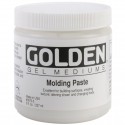
I even did a layout of my husband and I at the Phoenix Open! This was a mix of the My Mind's Eye Papers and Glitz papers. I used molding paste to add texture behind the photo along with some black paint and Dylusions Spray ink in White Linen (LOVE that stuff!!) I used the Stuck?! sketch you can find here. 

 The Thicker Letter Stickers are in the kit but they were a lighter, neutral color. I wanted black letters for this layout so I put some ink on them and there you go... that simple!

I adore these sweet Studio Calico polaroid frames that are in the kit! I added a Studio Calico die-cut and My Mind's Eye stickers.

Now for the girly, girl layout! I love the mix of My Mind's Eye and Echo Park Papers! And... I even have Glitz paper here!


Here is a close up of the polaroid frame and word phrases that are in the Studio Calico die-cuts. Boy does that package have a lot of die-cuts!! Love it!! I also used the KaiserCraft flowers and rhinestones. (The pink and white ribbon was a scrap of ribbon I had laying on my desk.)

I really like these glassine bags that are in the kit. They allow me to include my journaling without it being a focal point. I used a punch to get the design at the top and then added some of the Webster's baker's twine along with the My Mind's Eye stick pins.


I love this paper from Studio Calico! It is so fun and playful and perfect for scrapbooking pictures of my daughter and her best friend playing around! I also used up some scraps of Glitz paper for the banners under the photos.


 I used another glassine bag to hide my journaling and added some star confetti, rhinestones and twine!

See... I really did journal!! :)


And... after all those layouts were complete, I had enough paper to make this card. I actually have enough paper and embellishments to make another layout or a few more cards! I used the sketch from cardabilities that you can find here.

The "Hey You..." sentiment was cut from one of the My Mind's Eye journaling cards that are in the kit. Aren't I clever?!  :)

So.... I hope that my creative day gives you some ideas on projects you can make with this kit! This kit is available in the Frosted Designs Store! For the US store click HERE and for the AU store, click HERE!

4 Comments »