Hello everybody!
I am thrilled to be part of this wonderful team, and I am so excited to share my first project with you...
My name is Solange, but some of you may know me with my online name "Isbaha". I am a 36
years old stay-at-home mother to three boys (2-4-6 years old) and I live in a tiny French village.
I love everything with paper : mini albums, layouts, cards, tags,
boxes... but if I had to choose only one, it might be anything that you
can offer ! I enjoy everything homemade, especially embellishments, and I
try to share what I know with tutorials.
So now, let's see my project for today... Here is a tutorial for creating a set of 8 cards from only 12 patterned papers (6x6) and 3 cardstocks (12x12)! Almost no leftovers here...
Need to have some greeting cards ahead (Christmas in July, anyone?) or maybe some all-occasions cards available? This tutorial also works great for making a set of cards to offer, and... You will finally use some of these cute 6x6 paper pads!
To show you how versatile this tutorial is, I made three sets of cards.
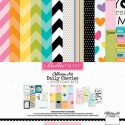
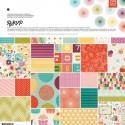
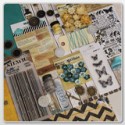
The first one uses the brand new Glitz paper pad "Brightside" and has a modern look:

See larger pictures of the cards on Snapguide:
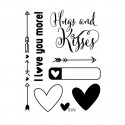
And look at
this stamp set by Elle's Studio:
I bought it because of the sentiment (it looks really great on the
cards), but my favorite stamps are the hearts, they look fabulous when
layered (black ink for the outlined heart and colored ink for the solid
heart)!
I used pop dots for some of them. The sentiment is embossed with white embossing powder.
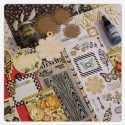
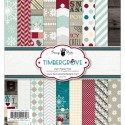
The second set of cards uses a Fancy Pants winter paper pad "
Timbergrove" (and good news, it's on sale!), and the look is more traditionnal:
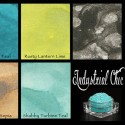
For this set of cards, I wanted a more distressed look, so I decided to play with my brand new Magicals by
Lindy's Stamp Gang.
These
powders are supposed to be mixed with a medium before using them, but I
plan to keep them in their powder form and to only mix the needed
amount with different mediums when I want. This color palette is right
up my alley, so I figured that I would have many uses for them!
So this time, I decided to mix my Magicals with my embossing powders.
First,
I mixed some white embossing powder with clear embossing powder: it
gives an interesting distressed look to the final result, because some
of the pattern is white, and some is clear BUT it can't be colored
because of the clear embossing, so you can see the color of the background.
(Note: mix only the needed amount of powder in case you don't like the look!)
Then, I added just a little of Time Travel Time Magicals powder and I mixed it carefully.
Even
when heat embossing, there is not enough wet to make the Magicals react and color the embossing
powder, but here is what I discovered: if you rub on the embossed stamping,
then, the color appears, like by magic! You can use a very-very slightly wet wipe (be
careful, the more wet you use, the more "painted" look you have!) or
just your finger for a subtler look.
Finally, I added
shadows with a brown pen, to highlight my sentiment. I am so excited to
try my Magicals with other mediums and see what happens!
(For information, my sentiment means "Season's greetings" in french).
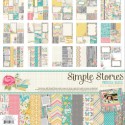
Finally, the last set of cards uses leftovers of one of my all-time favorite 12x12 paper pack by Simple Stories: "
Vintage Bliss" (this one is on sale too!), so I had to be a litlte more creative to make the cutting diagrams fit my leftovers, but it worked.
Now, I can see more cards with my leftovers and this tutorial in my future!
See larger pictures of the cards on Snapguide:
TUTORIAL
1. Choose 3 cardstocks (12x12) in neutral color and cut 8 cards (6x4). The remaining cardstock will be used to stamp the sentiments, add borders or make embellishments. Note that the card F also uses a (3-7/8 x 5-7/8) cardstock background.
2. Choose 12 patterned papers (6 patterns twice) from a 6x6 paper pad. See instructions about how to choose the patterns according to the cutting diagrams on the Snapguide.
3. Cut all the pieces following the cutting diagrams: don't forget to write the cardsketch letter on each piece
(on the side you're not going to use)!
4. Gather all the patterned paper pieces for each sketch (looking at the letter on each piece) and put the cards together. Here are the sketches:
5. Using the remaining patterned paper, make your own embellishments and/or add embellishments from your stash.
6. The card F mainly uses paper strips onto a cardstock background
(3-7/8 x 5-7/8), so leftovers are perfect for that, they are not included
in the cutting diagrams.
I hope you enjoyed this tutorial, and please, let me know if you used it!