Showing posts with label Ranger. Show all posts

Beautiful Life Notebook with Mindy!

Thursday, July 31, 2014


Hi there everyone. It's Mindy here.
I have a notebook I made using most of the products in this months Kit.
I just adore this kit. The colors are gorgeous. I just love the new Tim Holtz stencil. I used some 3d molding paste on my journal with the stencil. I have distressed the edges of paper with my scissors and then I distressed them with the Tim Holtz Crackle Paint.


I used some of the rub ons from the kit as well. Here's the sentiments along the bottom of the notebook. 


I also added some faux stitching along the top corner. I took the Maya Road Scalloped Frame and painted it with white acrylic paint. Then I added the rub on in the center.


7 Comments »

Pretty Paper + Sketches = 8 FABULOUS cards!

Saturday, July 19, 2014


Hello everybody!
I am thrilled to be part of this wonderful team, and I am so excited to share my first project with you...

My name is Solange, but some of you may know me with my online name "Isbaha". I am a 36 years old stay-at-home mother to three boys (2-4-6 years old) and I live in a tiny French village.
I love everything with paper : mini albums, layouts, cards, tags, boxes... but if I had to choose only one, it might be anything that you can offer ! I enjoy everything homemade, especially embellishments, and I try to share what I know with tutorials.

So now, let's see my project for today... Here is a tutorial for creating a set of 8 cards from only 12 patterned papers (6x6) and 3 cardstocks (12x12)! Almost no leftovers here...
Need to have some greeting cards ahead (Christmas in July, anyone?) or maybe some all-occasions cards available? This tutorial also works great for making a set of cards to offer, and... You will finally use some of these cute 6x6 paper pads!

To show you how versatile this tutorial is, I made three sets of cards.
The first one uses the brand new Glitz paper pad "Brightside" and has a modern look:


 See larger pictures of the cards on Snapguide:


Don't you think that the flairs from the Lucky Charm collection match the color palette of the Glitz papers in a nice way?
And look at this stamp set by Elle's Studio: I bought it because of the sentiment (it looks really great on the cards), but my favorite stamps are the hearts, they look fabulous when layered (black ink for the outlined heart and colored ink for the solid heart)! 
I used pop dots for some of them. The sentiment is embossed with white embossing powder.


The second set of cards uses a Fancy Pants winter paper pad "Timbergrove" (and good news, it's on sale!), and the look is more traditionnal:


See larger pictures of the cards on Snapguide:

How to Create 8 Cards With 12 Papers (6*6): Set 2

For this set of cards, I wanted a more distressed look, so I decided to play with my brand new Magicals by Lindy's Stamp Gang.

These powders are supposed to be mixed with a medium before using them, but I plan to keep them in their powder form and to only mix the needed amount with different mediums when I want. This color palette is right up my alley, so I figured that I would have many uses for them!
So this time, I decided to mix my Magicals with my embossing powders.

First, I mixed some white embossing powder with clear embossing powder: it gives an interesting distressed look to the final result, because some of the pattern is white, and some is clear BUT it can't be colored because of the clear embossing, so you can see the color of the background.
(Note: mix only the needed amount of powder in case you don't like the look!)
Then, I added just a little of Time Travel Time Magicals powder and I mixed it carefully.

Even when heat embossing, there is not enough wet to make the Magicals react and color the embossing powder, but here is what I discovered: if you rub on the embossed stamping, then, the color appears, like by magic! You can use a very-very slightly wet wipe (be careful, the more wet you use, the more "painted" look you have!) or just your finger for a subtler look.

Finally, I added shadows with a brown pen, to highlight my sentiment. I am so excited to try my Magicals with other mediums and see what happens!
(For information, my sentiment means "Season's greetings" in french).


Finally, the last set of cards  uses leftovers of one of my all-time favorite 12x12 paper pack by Simple Stories: "Vintage Bliss" (this one is on sale too!), so I had to be a litlte more creative to make the cutting diagrams fit my leftovers, but it worked. 
Now, I can see more cards with my leftovers and this tutorial in my future!


See larger pictures of the cards on Snapguide:

Check out How to Create 8 Cards With 12 Papers (6*6): Set 1 by Solange Jacquet on Snapguide.

In my sample above, I used homemade paper bows to embellish most of my cards, and I cut them from the leftovers. See a tutorial for making these paper bows (without any die) here: http://scrapyourscraps.blogspot.fr/2014/05/paper-die-cuts-paper-bows.html.

Or of course, you can use any other embellishments!


TUTORIAL

1. Choose 3 cardstocks (12x12) in neutral color and cut 8 cards (6x4). The remaining cardstock will be used to stamp the sentiments, add borders or make embellishments. Note that the card F also uses a (3-7/8 x 5-7/8) cardstock background.

2. Choose 12 patterned papers (6 patterns twice) from a 6x6 paper pad. See instructions about how to choose the patterns according to the cutting diagrams on the Snapguide.


3. Cut all the pieces following the cutting diagrams: don't forget to write the cardsketch letter on each piece (on the side you're not going to use)!

4. Gather all the patterned paper pieces for each sketch (looking at the letter on each piece) and put the cards together. Here are the sketches:


5. Using the remaining patterned paper, make your own embellishments and/or add embellishments from your stash.

6. The card F mainly uses paper strips onto a cardstock background (3-7/8 x 5-7/8), so leftovers are perfect for that, they are not included in the cutting diagrams.

I hope you enjoyed this tutorial, and please, let me know if you used it!


7 Comments »

Joni is Mixing it up with Frosted Designs Kits!

Monday, June 2, 2014

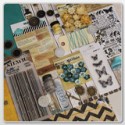
Welcome to today's Frosted Designs post... It's Joni here today and I'm going to share some fun things I've been playing with.... OUR KIT!!! -- And, I'm still playing with April's kit so just because it's June doesn't mean we can't still use up our older kits, right?

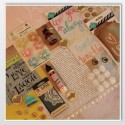
So, first I wanted to share a layout that I created using only a few items from the April Beauty of Nature kit, and mixed with items from my stash.  (who says you have to only use items in the kit together, right?)

Inspiration: I had remembered that last year when I was in Ohio, there was praying mantis on my parents front porch that I had taken a few photos of.  And...the April kit has Chipboard creatures from UmWow studios and one of them is a praying mantis.  


So, I started with one of the 7 Dots papers (sorry, I cut off the name before I realized I probably would want to share that with all of you) -  
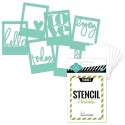
from the April Kit and one of the Heidi Swapp frame stencils shown here...  the one that says "today"  (yea, now you know why I highlighted those words above...lol!) --


I figured out where I was going to put my photo, and then I used the green Lindy's Magicals from the April kit, mixed with water and brushed that over the stencil.  I knew I was only using the bottom of the stencil so that's all I worried about.  Then I "cut out" the top of  the letter D in the word "today" with my craft knife.


I also went over the background paper with the Lindy's Magicals, green and brown, both mixed on my craft mat with a spritz of water.

I then used a PHOTO OVERLAY from Project Life to cover the larger photo...perfect sentiment and subtitle for my layout.  
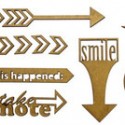
Embellishments include:  Arrow die-cut from the April kit, UmWow Studios Grasshopper from the April Kit, Prima Flower from the April kit (highlighted with the brown Lindy's Magicals), Maya Road Metal Camera clip, Prima canvas borders (highlighted with the green Lindy's Magicals). I added some Washi tape, Jute and paper leaves from my stash.


Another layout using the April Beauty of Nature kit --

Inspiration:  The sheet of Marion Smith paper named "Photo Op" from the "clean option" that is blue on one side and cameras on the other side .  While I'm a fan of the camera paper, I find it hard to use because of the size of the pattern.  And to be quite honest, I'm not a fan of the blue-ish back side at all....so, my challenge to myself is to figure out how to use it...and LIKE IT!!

I figured I'd better go with a linear design for this one...so I used the "Photo Op" paper that I mentioned above (front and back sides) and used the Marion Smith heart paper called "Cloud 9" (my fave) all together!!  I LOVE how this kit matches with Kraft color so perfectly, so I used that for my background.

Found a fun "small" photo of my parents with their grandsons...

I used the flowers, buttons, wood elements and die cut pieces from the kit, along with some twine from my stash.
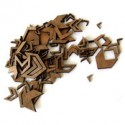
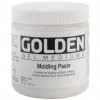
Now...I wanted to share a little fun thing I learned about the chipboard.
That flourish is also in the April kit...and as I was figuring out how I was going to "color it" for my layout, the Pearl Pen from the MAY kit was sitting right in front of me...so I gave it a shot.

I applied a thick layer by running the paint along the top of the chipboard...it was pretty "raised" and I just made sure it was even and covered.  It dried and is soooo gorgeous..it looks like an epoxy or enamel embellishment!!  Guess what I'll be using on chipboard more often in the future?!!
 1)  don't forget to go back and use your older kits up... 
(and mix them with other kits or even your stash)
2) find inspiration in weird things like bugs and papers that aren't "your style"
3) don't be afraid to try something new 

I've been playing with my April kit too... I'll be sharing a few of those layouts too!!  Both the April Beauty of Nature kit & May Simply Sweet kits are still available in the store-- get yours quickly!!
The April kit has been my favorite kit so far that Debbie and Barb have put together!! 
(and it's "just my style")


5 Comments »

2 Layouts with the Beauty of Nature Kit!

Wednesday, April 30, 2014

Hello friends, Cathi here. As many of you know, I have been through a lot with my family the last few months. I have not been at home all the time, and my dear brother in law has just passed only a week ago from a very short battle with pancreatic cancer. He was only 39.  But the world keeps turning even though we think it shouldn't sometimes, and my amazingly beautiful April kit from Frosted Designs: Beauty of Nature arrived while we were away in Dublin for the funeral last week. I was able to work on some projects this weekend when we arrived home, and it has been great to help me through all this...my creative pursuits are really my therapy.


Beauty of Nature

The beautiful April kit is chock full of 7 Dots gorgeousness in the form of the beautiful Nature Walk papers. Marion Smith's Nirvana collection in the kit is also stunning and I have featured it in my second layout. Feast your eyes here on all the amazing contents in the kit, the only thing I added from my stash here was some thread for my stitching! Beautiful mask, Lindy's magical paints, Tim Holtz Distress Markers, Prima flowers, wood pieces and crochet items...Maya Road metal pieces...UmWow chipboard, this kit is just full of gorgeous products!

Dream Big: Adventure Awaits Layout


For this layout I just had to choose a photo from a nature walk we did a few years back, of course!! The main paper is from the 7 Dots Nature Walk collection. I have also added several die cut pieces from the collection, as well as a sheet from Marion Smith's Nirvana collection under the photo.


I have painted the Chipboard Flourishes from Maya Road in the kit with the gorgeous Lindy's Stamp Gang Magical - Bells of Ireland Green, I just love the gorgeous sheen you get with these shimmery powder paints. I simply used a water brush to apply them.  I used two beautiful Prima Joyous Burlap Flowers for my layout, adding lots of other embellishment to my cluster: KaiserCraft Paper Blooms, Marion Smith Junque & Gems Metal Embellishments - Butterflies, praying mantis chipboards from the Um Wow Nature Walk Insect Chipboard Package, the postage stamp frame from the Prima Wood Die-Cut Icons - Stationers Desk.  Again I painted the chipboard mantises using the Lindy's Stamp Gang Magical - Mission Bells Brown for more lovely sheen.  You can also see several places where I used the Lindy's Mission Bells Brown mixed with molding paste to do my gorgeous masking using the kit's Harlequin Crafters Workshop Template.


In the top corner of the layout I added some more flourishes, frames, die cuts and a flower from the beautiful kit. Here you can see where I used the Bundled Sage and Walnut Stain Distress Markers and the cool new Tim Holtz Spritzer tool from the shop to make green and brown splashes on my page. I finished off the layout with some black stitching around the paper layers.

The second layout features Marion Smith's Nirvana paper. I love this photo of my oldest daughter Aine when she was a baby. I used several sheets from the collection, fussy cutting some flowers for my cluster around the photo. 

Love: Noted


I used more of the Prima Stationers Desk Wood Icons here, the butterfly, inkwell and Noted pieces and the gorgeous "Sweet Love" from the Prima Crochet Icons - Love You set. There are some Nature Walk die cut pieces used here and there and my final Prima Joyous Burlap Flower along with more Kaisercraft Mini Blooms.  


I took my water brush again and used it to drip and sprinkle on some of the Lindy's Stamp Gang Magical - Bells of Ireland Green then took the Tim Holtz Spritzer and my Walnut Stain marker and added splatters. Again I finished off the layout with some sewing around the edges. I really love how this turned out!!


Our new May kit will be out soon, and is another stunner, but I recommend this kit highly, so many gorgeous papers, mediums and embellies, you just can't go wrong.


4 Comments »