Showing posts with label Elle's Studio. Show all posts

Project Life with Megan!

Wednesday, December 10, 2014

Hi all! Megan here with you today!

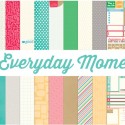
I am months behind in my Project Life album...yep, months. With the pregnancy, the move and now the holidays, I can barely find the time to scrap. But, that's what I love about Project Life. It's such a quick, easy and fun way to preserve your memories. And, no matter how far behind I fall, I still can jump right back into the project easily at any point because I write a weekly journal entry on my blog to include and organize my photos each week as well! So, no matter if it's the next week or the next year before I get around to scrapping a Project Life spread, I don't forget anything and the project remains stress free. I also turn to easy-to-use products that seem to "scrap themselves," such as all the awesome Elle's Studio products found in the Frosted Designs store. Their products are not only fabulous for Project Life but traditional layouts and other paper crafting projects as well!

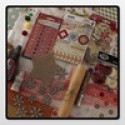
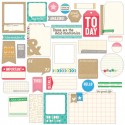
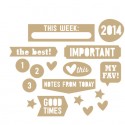
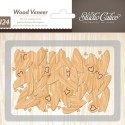
Here is my Week 14 2014 spread using my Project Life core kit and some fun goodies from the Frosted Designs store. I'm sure you can tell from this spread that I love wood veneers. They are the perfect relatively flat embellishment for pocket pages and I don't think I have yet to scrap a Project Life spread without them. This spread is very photo heavy, so I relied on simple embellishing as to not make things too busy; not only are the wood veneers great for this purpose, but die-cuts as well.

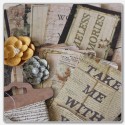
Here's a closer look at the left side of the page. I gotta say, I really love the mini placemats from Jillibean Soup because they make great filler cards. Love this sentiment one here that I backed with light green cardstock and accented with orange sequins.

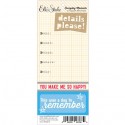
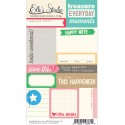
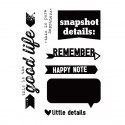
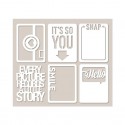
Now here's a better look at the right side. Both the photo of Liam and my mother-in-law vacuuming and the photo of Liam with my sister-in-law in the lower left are on Elle's Studio die-cuts. I totally love how the Everyday Moments die-cuts blend seamlessly with my Jade Edition Core Kit!

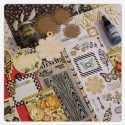
Finally, here are a couple close-ups of my spread...

I hope you all enjoyed my last post as a member of the Frosted Designs Design Team. I am stepping down in the new year to focus on Baby #2 coming in the Spring of 2015. I have loved being a part of this team and am looking forward to seeing what Barb and the rest of these talented ladies have in store for us all in the new year!

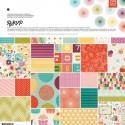
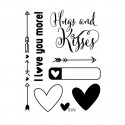
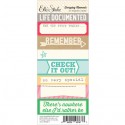
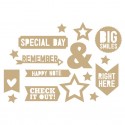
Products used from the Frosted Designs Store:

3 Comments »

Happiness Found with Joni!!!!

Friday, September 19, 2014


It's Joni Parker hosting today's post... and I'm sharing with you how I use typical Project Life elements but on a traditional scrapbook layout.

Here I used the Elle's Studio line "Everyday Moments" and created a layout that is in the typical block style of a project life page, but I used a 12x12 background instead of pocket pages.

I used pieces from the Journal Tags (Highlights), from Bits and Pieces (Extraordinary), from Lil Snippets (Details Please and Remember) and I cut a piece from a larger sheet (Happiness Found)


I also used a Jillibean Soup mini placemat for a frame .. (Best Day Ever).
  
And I tied it all together with 4 small border strips and a few wooden stars.


So don't be afraid to purchase items that are created for Project Life...those can be used just as well on traditional scrapbooking layouts (and they are easy to use too!)!!


3 Comments »

The Deconstructed Layout with Anita!

Wednesday, September 3, 2014

Hi everyone, it's Anita here today and  I have another installment in my Deconstructed Layout series to share with you

For my project I am using the fabulous Summer's End kit from Frosted Designs
 

Today's Deconstructed Layout is about using repeating patterns and colors. I really wanted my photo on this layout to stand out, but I still wanted to be able to use a fair amount of detail and embellishments on the page. 
In order to do this, I kept the colors to a minimum and repeated the same shapes over and over. 


Here's a look at my layout
My goal was to have lots of detail on the page, but make it blend into the background and let the photo shine in front. 
To make this happen, I 
1. repeated the same basic shape of the KRAFT DOILY from the kit several times.
*doilies
*stenciled background
*brads
*flowers
2. I REPEATED the pattern of the KRAFT DOILY on the edge of my punched strip
3. I picked a color from the photo (Golden Yellow)and went several shades lighter for the color of my embellishments/background

The Petaloo flowers included in the Summer's End kit were perfect, and I used a  We R paper from the kit to mat my photo.The Gold dots are from the December Mixed Media Kit, and the metal piece is from the Summer's End. 


This is the same cardstock I used to mat my photo with, I punched both edges and added a strip of glitter down the center. The die cut stickers is also included in the Summer's End kit.


On the kraft doily I inked the edges and added some faux stitching- and I cut them in half before I tucked them under the photo mat. Now, I still have 3 to use again on another project. I stamped here with Elle's Studio stamps and the brad is from the Capture the Moment's kit. 


I loved the resin accents from the kit, so to make them blend in I used the same ink on them as I used else where and buffed with a dry cloth. I added some ribbon and more pearls here. 


Thanks so much for stopping by today. 
I hope you have enjoyed this installment of my Deconstructed Layout series! 


4 Comments »

Back to School with Solange!

Tuesday, September 2, 2014

Hello, Solange here!
Today is the first day of school in France, and I thought it would be a good idea to make a new set for my desk, because I use so many notebooks!

Here, the weather is still nice, but you can already feel some changes... Fall is not that far! And I wanted a color palette with this feeling, between summer anf fall.
When I found this collection by Basic Grey, I was very happy, and I knew that I wanted to highlight the subtle touches of purple... So I decided to use some hearts stamps by Elle's Studio with purple ink.


Embellishing these notebooks was really easy, because I simply stuck patterned paper on it, without bothering about the binder: I added some ribbon along it and that's all!

I also made a sticky notes holder:


To create an harmony between all the elements, I used the same yellow twine, the same heart stamp and the same folded music heart.


I embellished the bigger notebook with an alphabet cut from my favorite patterns of the collection, and I outlined each letter (with a black pen first, then with a white pen).


This folded music heart is really easy to make: first I stamped a music pattern on thin white paper (using a KaiserCraft stamp). Then I cut 3 hearts. Finally, I layered them and I stitched them on the middle.

 
You could also use a text stamp, cut butterflies... The sky the limit!

http://isbahashome.blogspot.fr/


4 Comments »