
Hello ~ Lori here with another Telling Your Story With Lori scrapbook technique.
Last month, my post was about Balance ~ How to create balance in your layout. This month, I will show you how to use Math to create balance. Math??? Yes Math. I never realized how much I would use Math after high school and college!!
As in anything important (school, sports, work, scrapbooking) a good foundation is the key to success. I find that Math helps me with my scrapbook foundation.
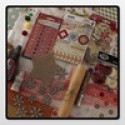
Let's get our tools and get started:


As in anything important (school, sports, work, scrapbooking) a good foundation is the key to success. I find that Math helps me with my scrapbook foundation.
Let's get our tools and get started:
I start with a ruler (or two), my paper cutter, my mat with a 1" grid and my scissors. Most of the time I start my layout with my photos. I want my photos to be the main focus of each layout because without photos - why create a scrapbook page?
The first thing I do is determine if I am going to mat my photos or not. The second thing is what color will I use. Because these photos are pretty busy, I chose black for my photo mats.
Our mayor came to Tanner's school Friday. The second graders just finished a unit on community and had a class election the week before. One of the teachers took some pictures of his presentation on her cell phone. When I printed the pictures out, the 4" x 6" photo was not actually 4 "x 6".
As you can see here, the length is 5 3/8". In order to get a perfect 1/8" mat for my photo, I added 1/4" to both sides.
I trimmed my mat to 4 1/4" x 5 5/8".
Sometimes, we can't fit all of the pictures on our page the way they are, so we trim them down. My go-to trim is 4" x 4".
In order to see where to make the cuts to create a 4" x 4" photo, I put the photo on my paper trimmer. For today, I used some scrap black paper so you can better see the cut lines. I wanted to leave a tiny bit above the mayor's head as long as it did not cut off too much of the children's legs.
I put one black strip where the cut line is and the other at the 4" mark.
I trimmed off the top and then turned the photo upside down and measured to 4 inches and trimmed the bottom.
I also trimmed the mat to 4 1/4" x 4 1/4". I trimmed a mat for the 5" x 7" photo to 5 1/4" x 7 1/4" and set both photos and mats aside.
Back to balancing the layout - you can divide your paper into thirds for photo and background paper placement. The first example I have is horizontal. This gives you a guideline. I know that 1/3 of 12" is 4" so I cut two 4" x 12" strips to demonstrate.
The second example is vertical.
The third example is both!
One more example is to divide the paper in half - so I cut a piece of 6" x 12" piece of black scrapbook paper to give you a visual. This can be horizontal or vertical as well.
For my layout today, I chose the horizontal thirds option (my first example).
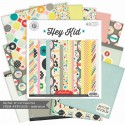
I used a piece of paper from Hey Kids as my background paper. I cut the red chevron paper from the December kit to 4" x 12". I placed the chevron paper in place and set my photos on top.
I wanted to put the title under the large photo but not hanging down below the small photo. I took out my ruler and measured the area. When I designed the title on my Cameo, I made sure it was sized within 5 1/2" x 2".
I also needed a journaling spot. I measured and area 2 1/2" x 3" and trimmed some scrap paper to fit the size.
At this point, nothing is glued down. I removed everything from my paper and grabbed my fun supplies!!!
I spritzed my paper with Cherry Pie Dylusions Ink and Teal Heidi Swapp Color shine. In this photo you can see I spritzed the chevron paper too.
I cut my title and election arrow tabs on my Cameo.
My title fit perfectly in the space below the large photo. I chose this title because the Mayor picked 8 students (including Tanner second from the left) to represent the City Council.
I attached part of an arrow tab and stapled it to my journaling tag. One of these months we will explore handwriting and why it is so important!!
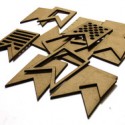
Under the small photo, I created a banner look to mimic the arrow tabs. I colored the wood pieces black with my Farber-Castell PITT artist pen big brush. I trimmed two flag pieces of cardstock leftover from my cameo cuts to create a dark red flag.
Here is my completed layout done without a sketch this time, just with my Math skills!! As you look at this layout - where does you eye go first. I hope it goes to one of the photos!!
Until next time,

3 Comments »


3 Responses to “Creating Balance and Using Math!”
Great tips and great page!! LOVING this!!!!
Look at you, creative AND smart!
Thanks for the laugh Sandee!!!
Post a Comment