Showing posts with label Telling Your Story. Show all posts

Telling Your Story Though Scrapbooking With Lori

Saturday, June 7, 2014

Hello and Happy Saturday!!  Lori here with you today.  I know that time is very limited for everyone - especially scrapbookers!!!  Today I want to share a time saving tip with you.  

Creating with a Scrapbook Kit has save me tons of time.  I was not a kit subscriber until a few months ago.  I figured I have 3,000 pieces of paper at home - why do I need a kit??  Well, I never had the right shade of blue (or any other color) to match my photo or my pretty new flowers.  Buying a kit takes all the guess work out of matching colors and themes for us!!

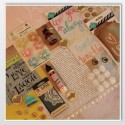
I recently attended a wedding of a good friend of mine.  I wanted soft colors with a pop of color added.  The perfect kit to use was Simply Sweet from Frosted Designs:

I started with this beautiful paper:

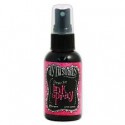
I took the stencil Live, Love, Laugh and used molding paste with it.  Once dry, I spritzed some Dylusions Bubblegum Pink ink spray (from a previous Frosted Designs kit) on it. 
I also spritzed a tag and flower - both from the kit. 

I tucked the doily sticker behind my photo. 

I journaled on this tag and pop-dotted it over the photo.

I used the word "together" as my title.  My friend Renee and I went to the wedding together.  We have both been through thick and thin with our friend Karyn and wanted to support her together!!

The idea for this layout came very quickly.  Waiting for the paste and ink to dry was the longest part!!!

I hope you try a kit - I was hesitant at first but I am totally hooked now!!!  For a chance to win a $15 discount off a kit please leave me a comment below telling me if you have ever used a kit (there is no wrong answer) and if the answer is no - what has been your hesitation!!!  I will pick a winner on Wednesday, June 11 using Random Number Generator (aka Randy)!  Good luck!!


7 Comments »

Lori - Telling Your Story Through Scrapbooking!

Monday, May 12, 2014


It is important that we FOCUS on a few things when scrapbooking!

First of all, make sure your photos are in focus and are the best photos of the bunch to tell your story.  Just because we take 15 pictures of each event doesn't mean we need to scrapbook (or even print) all of them!!  This took me several years to learn this!!

Also, make sure your page has a focus.  If you don't have a clear focus - the page is confusing to others and they will quickly look at it and move on.   If you don't have a theme - make one!!

The eye naturally travels over a scrapbook page in a Z pattern.  Try to place your photos and embellishments in the same pattern. 

For this layout, I used a sketch:
I used the left page as my guide.  Sometimes a sketch helps me keep my focus!!
My focus for this page is the random single photos that recap some of Tanner's highlights of 2nd Grade - the book fair, the Pancake Man and the marble run the class made.  

I had only one photo of each event and did not want three separate layouts.  The colors in each photo were close enough that they did not clash when all put together.

I used this yummy paper and tag from the Simply Sweet Kit!

I used my tag for my title and hand wrote the highlights with my white gelly roll pen. 
I added some wood veneer school themed pieces on my paged on the corners of two pictures and the bottom left hand corner.  I added white numbers at the top bottom opposite corners. 

I tucked a burlap weave ribbon behind the photos to ground them.  Without it - they would be floating on my page (or out of focus).

I sure hope this helps you with your layouts - I know it has helped me!!


 photo Lori_zpsea64f050.jpg

6 Comments »

Creating Balance and Using Math!

Thursday, February 6, 2014


Hello ~ Lori here with another Telling Your Story With Lori scrapbook technique.

Last month, my post was about Balance ~ How to create balance in your layout.  This month, I will show you how to use Math to create balance.  Math???  Yes Math.  I never realized how much I would use Math after high school and college!!

As in anything important (school, sports, work, scrapbooking) a good foundation is the key to success.  I find that Math helps me with my scrapbook foundation.

Let's get our tools and get started:
I start with a ruler (or two), my paper cutter, my mat with a 1" grid and my scissors.  Most of the time I start my layout with my photos.  I want my photos to be the main focus of each layout because without photos - why create a scrapbook page?

The first thing I do is determine if I am going to mat my photos or not.  The second thing is what color will I use.  Because these photos are pretty busy, I chose black for my photo mats.

Our mayor came to Tanner's school Friday.  The second graders just finished a unit on community and had a class election the week before.  One of the teachers took some pictures of his presentation on her cell phone.  When I printed the pictures out, the 4" x 6" photo was not actually 4 "x 6". 
As you can see here, the length is 5 3/8".  In order to get a perfect 1/8" mat for my photo, I added 1/4" to both sides. 
I trimmed my mat to 4 1/4" x 5 5/8".

Sometimes, we can't fit all of the pictures on our page the way they are, so we trim them down. My go-to trim is 4" x 4". 
In order to see where to make the cuts to create a 4" x 4" photo, I put the photo on my paper trimmer.  For today, I used some scrap black paper so you can better see the cut lines.  I wanted to leave a tiny bit above the mayor's head as long as it did not cut off too much of the children's legs.

I put one black strip where the cut line is and the other at the 4" mark. 
I trimmed off the top and then turned the photo upside down and measured to 4 inches and trimmed the bottom.

I also trimmed the mat to 4 1/4" x 4 1/4".  I trimmed a mat for the 5" x 7" photo to 5 1/4" x 7 1/4" and set both photos and mats aside. 
Back to balancing the layout - you can divide your paper into thirds for photo and background paper placement.  The first example I have is horizontal.  This gives you a guideline.  I know that 1/3 of 12" is 4" so I cut two 4" x 12" strips to demonstrate. 
The second example is vertical. 
The third example is both! 
One more example is to divide the paper in half - so I cut a piece of 6" x 12" piece of black scrapbook paper to give you a visual.  This can be horizontal or vertical as well.

For my layout today, I chose the horizontal thirds option (my first example). 
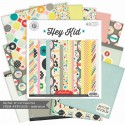
I used a piece of paper from Hey Kids as my background paper.  I cut the red chevron paper from the December kit to 4" x 12".  I placed the chevron paper in place and set my photos on top. 
I wanted to put the title under the large photo but not hanging down below the small photo.  I took out my ruler and measured the area.  When I designed the title on my Cameo, I made sure it was sized within 5 1/2" x 2".

I also needed a journaling spot.  I measured and area 2 1/2" x 3" and trimmed some scrap paper to fit the size.

At this point, nothing is glued down.  I removed everything from my paper and grabbed my fun supplies!!! 
I spritzed my paper with Cherry Pie Dylusions Ink and Teal Heidi Swapp Color shine.  In this photo you can see I spritzed the chevron paper too.

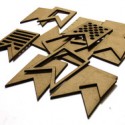
I cut my title and election arrow tabs on my Cameo. 
My title fit perfectly in the space below the large photo.  I chose this title because the Mayor picked 8 students (including Tanner second from the left) to represent the City Council. 
I attached part of an arrow tab and stapled it to my journaling tag.  One of these months we will explore handwriting and why it is so important!! 
Under the small photo, I created a banner look to mimic the arrow tabs.  I colored the wood pieces black with my Farber-Castell PITT artist pen big brush.  I trimmed two flag pieces of cardstock leftover from my cameo cuts to create a dark red flag.
Here is my completed layout done without a sketch this time, just with my Math skills!!  As you look at this layout - where does you eye go first.  I hope it goes to one of the photos!!

Until next time,
                                      photo Lori_zps2a01ac7d.jpg


3 Comments »

Telling Your Story with Lori!

Thursday, January 9, 2014


I am Lori Apgar and I am going to help guide you on how to Tell Your Story Through Scrapbooking.  I taught Scrapbook Design and You (SDU) classes at Michaels and got my certification through EK Success (now called Spotted Canary).  SDU is a four week class, but here at Frosted Designs, I plan to give you condensed “shots in the arm” versions each month to help you create your story on paper. 


Today I am going to focus on BALANCE.  Balance happens to be my One Little Word for 2014 so I thought it would be a good place to start.

Balance means different things in scrapbook layouts.  It can be difficult to find the balance between pictures and titles (sizing), or the balance between having too many pretties (embellishements) or not enough, or even the balance of how much time you are spending to make it a "perfect" layout compared to how much time you can spend scrapbooking.  

Balance can also help you put everything together so it looks pleasing to the eye.  Most people spend 5-10 seconds looking at scrapbook layout in an album - you want to find a way to keep their attention and have them notice the most important part - the photos!!

We are going to focus on balancing our pictures and titles within a layout.  My go-to title used to be 2"x12" which is a 1/6 of the page!!  On some layouts that works just fine.  I had to look at what I wanted the title to represent - a headline, or a one-word POP or something in between.
For my layout today, I am scrapping my son's Winter Party at school.  He begged for a snowball fight - so I wanted to use that as the title.  I had 3 photos, but picked the best two because they were all similar and very busy photos.  I wanted to keep the layout pretty simple so it did not compete with the photos.
I found a sketch to use (which is optional but sometimes helps).  The title is small on the sketch, but I don't always follow the sketch exactly so I came up with some different versions to see what looked the most balanced to me.


I used my cameo to create these visuals for you and I added my supplies.   As much as I like the bigger title, I think the medium title looks best (like in the sketch).   While all three sketches are good, the first two options have too much white space and don't hold my interest as long as the third option.  As you can see, there are no WRONG answers in scrapbooking - just guidelines!

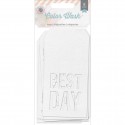
I really wanted to use the tag Best Day because that is how Tanner described the party.


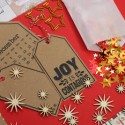
 I used some Heidi Swapp ink to mist the tag and snowflakes as well as a piece of watercolor paper.  As you can see above, the Best Day is larger than my title and does not look balanced - it looks like I have two competing titles - so I took it off.


Instead I used the top side of the tag and wrote my journaling on it.


Here is my finished layout.  I am very happy with how it turned out.  By the way, the snowballs are crumpled up pieces of tissue paper.

Thank you so much for joining me today!  Balance can be used in many different projects, not just scrapbooking.  But if you do create layouts, you should consider the monthly scrapbook kit - I used papers from the Season of Stars Scrapbook Kit and chipboard snowflakes from the December Mixed Media kit.  The kits are packed with coordinating papers and embellishments.

I would love to hear from you what topics you think will help you create your pages.  Please leave me a comment to let me know what you would like to see next!


4 Comments »