Archive for March 2013

Sunday Inspiration - Scallops!

Sunday, March 31, 2013

For those of you who celebrate, we would love to wish you a Happy Easter!


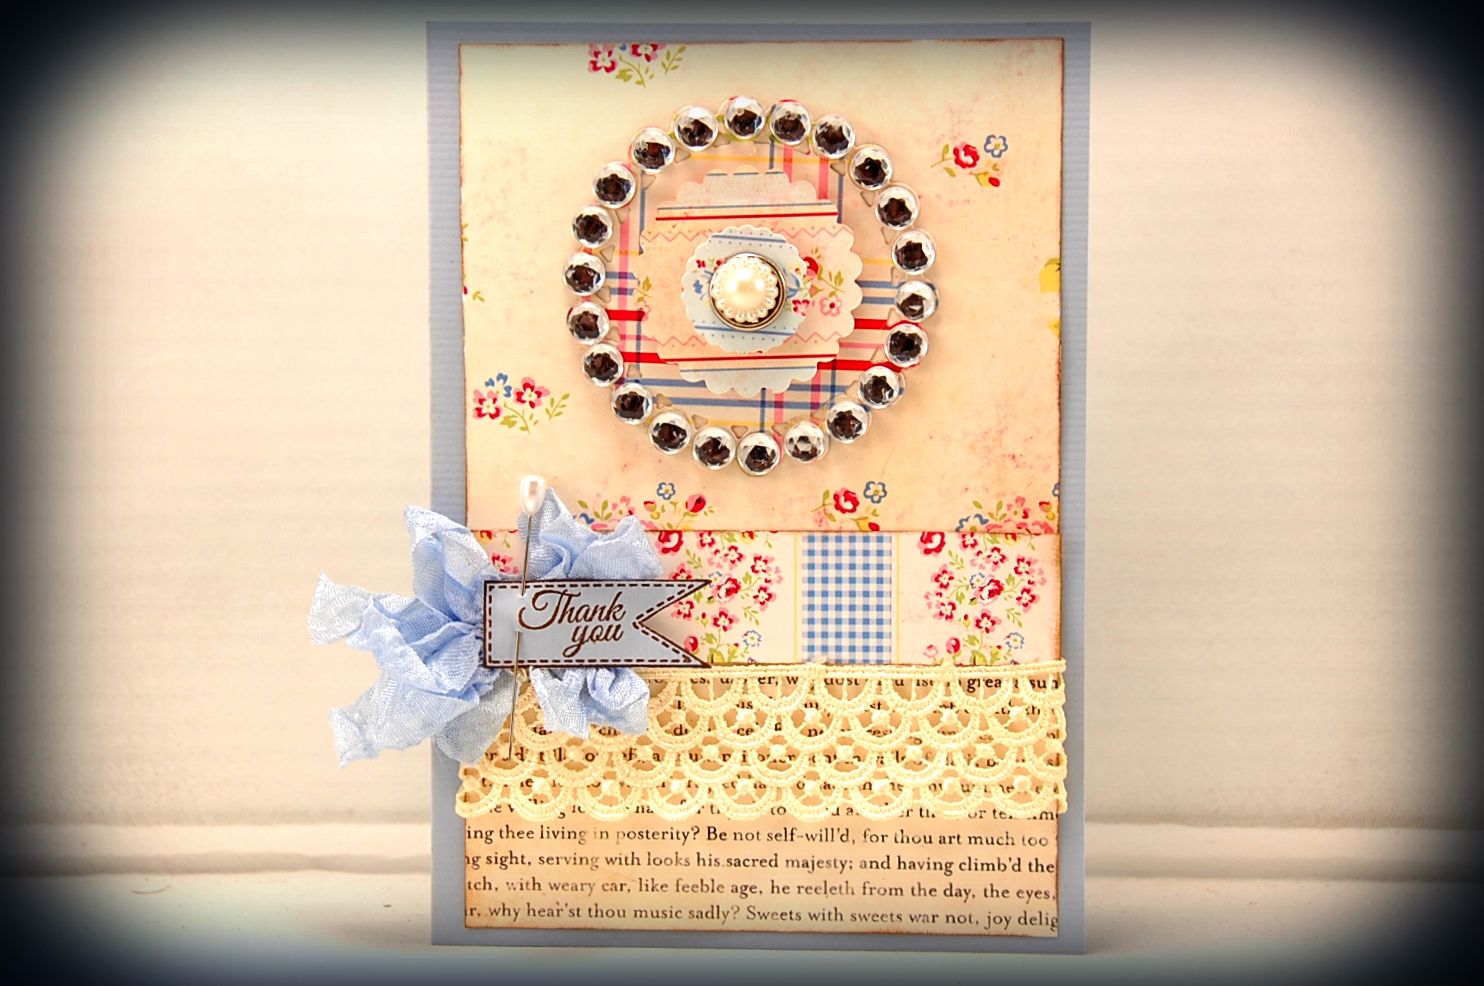
And now, please enjoy our Designers' Scallop projects!

Deena


2 Comments »

Friday Inspiration - Scallops!

Friday, March 29, 2013


1 Comment »

Fabulous Friday Challenge - Scallops!

Are you ready for a new challenge?! This week it's simple.... 

Scallops! 

Make a card, layout or off the page project with scallops on it and you can enter it into our challenge to be eligible for this prize!


This weeks sponsor is 

Words or Whatever was created as a subsidiary company to NEIL'S TIMBER SIGNS after purchasing a laser engraving machine.  Words or Whatever is run by Suzanne and Neil Webster on the lovely Central Coast of NSW.

We can cut chipboard in both 1.2mm and 1.8mm, MDF from 3mm to 25mm thick, acrylic, felt and cardstock.  We specialise in custom orders that have no minimum quantities.  Please don't hesitate to contact us with your requests.  We can also provide custom made items exclusive to individual stores at no extra charge.  Do you want something in particular?  Well just ask us!!  This means you can offer this service to your customers so they can order their children's names or individual titles for their pages.


This weeks Prize is 10 pieces of chipboard of  your choice
There is some amazing chipboard designs, go over and check it out HERE


*PLEASE REMEMBER, WE ASK THAT YOU ONLY SUBMIT ONE PROJECT PER CHALLENGE! THANK YOU!*

5 Comments »

Fabulous Friday Top 3 & Winner!

Thursday, March 28, 2013


So many creative entries for our Up, Up & Away Challenge.
Thanks to all of you who played along!
To all of you that joined our challenge please remember that we only allow one entry per person.  Please check our "About Us/Rules For Our Challenges" page for all of the details.
Here are the Top 3 as picked by our design team:


Pooja
 

Congrats ladies!  
If you would like a Top 3 blinkie for your blog please
email Debbie at frosteddesigns@ymail.com. 
Please put FD Top 3 in your subject line.

We would like to thank Creative Chaos
 

for sponsoring our challenge with
 an altered box filled with various handmade flowers
to the value of $25.00!

The winner is
Fern Riley

Congrats Fern!  
Please email Debbie at frosteddesigns@ymail.com with your mailing information.  
Please put FD Winner in your subject line.
You have 7 days to claim your prize.

Don't forget to check back tomorrow 
for a new Fabulous Friday Challenge and some 
amazing inspiration from our design team!

5 Comments »

Tutorial Tuesday with Monique!

Tuesday, March 26, 2013

Hi everyone,
Monique here with a funky way to jazz up your card backgrounds using a technique called Embossed Resist.
This is the card I made using this technique:


What You Need


  • White Cardstock
  • Background Stamp.
  • Embossing Powder
  • Embossing Ink
  • Heat tool.
  • Variety of spray inks.
  • Paper Towel.
1,  Cut your white cardstock to 9" x 61/4".  Score at 41/2".

2.  Thoroughly cover your background stamp with Embossing Ink.


3.  Sprinkle with Embossing Powder - make sure all of the stamped image is covered.  Carefully shake off the excess onto a scrap piece of paper and return to jar. 

4.  Heat powder with a heat tool to make the powder "set."


5. Spray your inks onto the card randomly, layering them upon each other.


6.  Carefully rub the ink off the embossed areas using some paper towels.


7.  Allow ink to dry, then decorate card as desired.


Thanks for popping by everyone!!  Hope you enjoy using this technique, and enjoy your week!


2 Comments »

Tutorial Tuesday with Sassy!

Tuesday, March 19, 2013

Altered Scrapbook Paper

Today, it is my turn (Sassy at Sassy Moments) with a tutorial on altering scrapbook paper.

We all have some on the shelf, in a pile under the bed, or packed away in a box - the dreaded scrapbook paper we don't like and have no clue what to do with it.  We have tried giving it away or stared at it hoping for some inspiration.  This tutorial will give you a quick and easy way to solve the problem.  You can't go wrong!


Gather your supplies:
Brushes, brayers, various objects for stamping;
stencils, fiber paste, molding paste/gel;
ink pad (I use Archival) and stamps;
acrylic paints;
ink sprays and color washes;
UGLY paper;
basically anything to keep layering colors
and textures until reaching your desired outcome.

I normally use white acrylic paint but for this
I used yellow.  After putting a glob of paint on each paper
I begin to paint it on the paper.  To make it apply
easier and smoother, spritz with water.
Between each step paper needs to dry.  To speed up the process,
use your heat gun.


For this tutorial, I am brayering on the color. 


I brayered vertically and horizontally.  It is
OK to overlap colors giving even more dimension.


Using a stencil, I began in the lower-right hand
corner and painted on the stars.
Without adding paint flip the stencil over
to get a completely different affect.

In the beginning I mentioned gathering various objects.
This is a piece of cupboard liner paper that I
tore off the roll. Later I use two different
sizes of bottle caps to stamp circles.
After pressing this material in the ink I randomly
stamped it in whole and bits on the paper.

I love using molding gel or fiber paste.  Seldom do I
use a brush or palette knife to apply.  I use my hands and
fingers.  Smooth a thin layer over the stencil and lift off
the page. Be sure to immediately put the stencil with
the remaining fiber paste in soapy water.  This paste
dries fast!  When I work I always have a tub of
warm soapy water next to me to toss in items. 
If there is one thing I cannot get enough of -
ink sprays.  I chose these colors to spritz
on the fiber paste. They all blend so nicely.
You can see here the cupboard liner paper stamped
randomly. The cranberry color wash was applied by taking
the cover off and using the actual mister and flicking
drops all over the pages.

Once the misting and color washes are applied,
I take a roll of paper towels and roll over
the pages picking up the extra color.  The paper
towels I will save for another project.

I still wasn't happy and wanted to add more.
Doing so is more the norm for me as I want to
add just one more color, one more shape, etc.
Using the applicator I spounced silver all over and
with the remaining paint took two different
bottle cover caps and stamped circles, too.


Progress so far showing both pages together.


The one on the left was the red/ivory/blue paper and
on the right the ticket like paper.

Not done yet!
There is one step left.

To seal each page, spray with the above
or something similar.


The sealer adds a bit of a sheen.


Besides adding sheen, the colors become
a bit more vibrant.

I love it and am thinking of adding some words, maybe a bit of She Art and hanging it.

Like I said when this started, you can't go wrong.  If you don't like something, paint over it.  Still don't like it, add a different color.  Keep going until you are happy!

I hope you give this a try.  It is also something I would turn younger children loose on creating. 


11 Comments »