Showing posts with label Mixed Media Paper Kit 2013. Show all posts

BIG SALE on Frosted Designs Kits!

Thursday, January 23, 2014

It is a new year and we want to clear out some products so we can bring you more fabulous things throughout 2014!! What does this mean to you?! GREAT DEALS!!

We are starting with the Frosted Designs Kits! All of the Kits from 2013 are 50% off when you use the code KIT50 at checkout! Some of these kits are already discounted and you can get an extra 50% off the discounted price which makes them cheap, cheap, cheap!!! (For as little as $14!!!)

Here are the kits you can choose from…..


Click on the title below each photo to to directly to that kit in the Frosted Designs Store. A few of these kits are close to selling out so be sure to order quickly for best selection! Remember to use the code KIT50 at checkout! 

Have fun shopping!


COMMENTS: »

Anita's Stars Sparkle and Shine!

Thursday, December 19, 2013

Hi everyone, it's Anita here today and 
it is my turn to share a project with you!
This is my second project from the 

This is such an AWESOME kit! You are
going to want one for sure!  
This kit has so many great pieces I really didn't add that much to it. 
I threw in the Dusty Attic chipboard and the lg Prima Flower, the brad is from last months kit.

I sprayed my cardstock with the Heidi Swapp Color Shine included in the kit - pretty much covered
the whole sheet with a light mist.

I cut the stars from the sheet of white glitter felt and outlined
them with the Frosted Lace Stickles (both included) I sprayed the Linen Star with the Gold Color Shine
and outlined it with a white pen. The star chipboards are from UmWow, I sprayed with
White Dylusions, dried with my heat gun, then sprayed with the Gold Color Shine.


Here is another look at one of the stars, I used the heat gun to bubble up the spray inks. 
You can also see the texture on the chipboard piece; I used modeling paste in a thick
heavy coat, then let it dry. I sprayed the whole thing with Gold Color Shine, then a little spritz of the Red Perfect Pearls. When it was dry I applied a light coat of ink.


Here is another look at the chipboard. The resin flower is included in the kit too!

I used the cheesecloth from the kit for a mat behind my photo. I sprayed
the cloth with Gold Color Shine, dried with a heat gun, then cut with my 
pinking scissors.

Be sure to hop over to the Frosted Designs Store  to 
order your kit - you will love it!
 
Thanks so much for stopping by today!!
The Flamingos wish you all a Merry Christmas!
Anita

6 Comments »

Anita Shares a Stunning Layout & a Tutorial!

Monday, December 16, 2013

Hi everyone! 
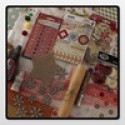
It's Anita here today to share a layout I made with the new 
December Mixed Media Paper Kit from Frosted Designs.
This kit is fabulous- I love it!!

WARNING:
 There are a lot of photos today, sorry!
Love, love , love the blues on the Christmas lines this year. 
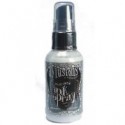
I used a LOT of spray ink on this layout- the doily was pretty much
soaked with the Heidi Swapp Gold Color Shine that is included in the kit. 


The package of die cuts in the kit is fabulous- I layered several of them here
next to my photo. For my background I used a stencil, Molding Paste, Gelatos® and glitter -
there is a tutorial below.


Here is a close-up of the background. I wrapped the beautiful sparkly tulle from the kit around
my paper for more dimension. The wooden stars were sprayed with the Perfect Pearls Forever Red
 from the kit.


For my title I painted chipboard first with acrylic, then I sprayed with the Perfect Pearls Forever Red
and the Gold Color Shine from the kit. It is a little hard to see the gold in the photo, but
it is pretty visible in person!


For the flowers, I sprayed them with the Gold Color Shine first, then spread Frosted Lace Stickles
from the kit around the edges of the petals.The chipboard snowflakes were covered 
with the Stickles and while wet I added the bling, also from the kit.


I used a gold paint pen on the edge of the paper that you see here. For the texture on top of the buttons,
I mixed gloss gel, glitter, and the beads from the kit and spread on top.
I added the Stickles in the corners of the papers.


I sprayed the tiniest, tiniest bit of Forever Red ink on the corner here.
Seriously, I held the paper like 2 feet from the sprayer and misted one time. 
I just wanted a little blush of color there.

Tutorial:
For the background here are the steps:
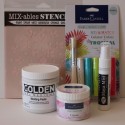
I put a small amount of my Gelatos® on my paper and mixed with Molding Paste.
I spread this over my stencil and while the stencil was still in place…..


I sprinkled my glitter on and pressed it into the paste.


Ta-da!  This is a super easy technique and you will love how it looks.


For the texture on top of the buttons, I mixed Gloss Gel, the beads from the kit and
Diamond Dust Glitter together.


 Put a piece of scrap paper over your photo and spread the mixture all over. I put mine on
pretty heavy, but you can always put less. Put it aside to dry overnight. In the morning I
gave it a spritz with the Gold Color Shine included in the kit.

WHEW! 
Are you still with me? 
Thank so much for stopping by today!

Anita

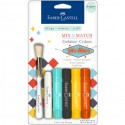
in addition to the December Mixed Media Paper Kit, I also used the following;

10 Comments »

December Mixed Media Paper Kit Reveal!

Sunday, December 15, 2013

I have to say, this might possibly be my favorite kit yet! The stunning mix of colors combined with the mists, embellishments and paper make this kit a must have! And, you can now purchase one for yourself!


This kit Contains: 


1 - Pink Paislee Snow Village Double-Sided Paper - Fruitcake
1 - Pink Paislee Snow Village Double-Sided Paper - Hot Cocoa
1 - Pink Paislee Snow Village Double-Sided Paper - Buttered Rum
1 - Fancy Pants Merry Little Christmas Double-Sided Paper - Wassail 
1 - Fancy Pants Merry Little Christmas Double-Sided Paper - Santa's Workshop
1 - Fancy Pants Merry Little Christmas Double-Sided Paper - Baubles
1 - 9"x12" Glitter Felt - White
1 - Square Cheesecloth
1 - Maya Road Linen Star
1 - Heidi Swapp Color Shine - Gold
1 - Ranger Perfect Pearls Mist - Forever Red
1 - Ranger Stickles - Frosted Lace
1 yd. May Art Net Ribbon - Red
2 yds. Gold Glitter Tulle
1 - Round Seed Bead Mix - Mudslide
1 - Pink Paislee Snow Village Ephemera Package
1 - Fancy Pants Merry Little Christmas Label Stickers
1 - Prima Marketing Say it in Crystals - Holiday Jubilee
10 - Maya Road Chipboard Snowflakes
4 - Fancy Pants Merry Little Christmas Resin Flowers
1 - Maya Road Ruffled Flowers (Petaloo flowers may be replaced in some kits) 

This kit is now available in the Frosted Designs Store! Click HERE to purchase

We will be sharing the Design Team projects over the next several days so stop back for plenty of inspiration and some tutorials! Here is a peek at one of the projects….


3 Comments »

Happy Moments - Anita Shares a Canvas Tutorial!

Wednesday, November 20, 2013

Hi everyone! How is your week so far?
 Wonderful I hope!

 It's Anita here today and my turn to share a tutorial with you.
This project was really pretty quick,
waiting for the gesso to dry was the longest part!!

  I love adding color and texture to my projects and using the
November Mixed Media Kit and the Mixed Media Starter Kit
from Frosted Designs will give you a lot of options.
This is my second project from the November kit and I still have a ton of pieces left. 
I feel a third project coming on!
I used the Hexagon Canvas piece from the November kit as my base. I embellished with lace, roses, buttons, and papers from the kit as well.
Here is how I created my background;
I used a resist embossing technique  for my background. To start my background I stamped a large pattern with VersaMark and embossed with clear powder. The embossed areas will resist the ink when you apply it- it is pretty cool!
I think this technique works best with darker inks, so I used the  Denim and Schoolhouse inks from the kit. To add the color I used the inks from the kit and applied them with wet wipes, rubbing the color into the canvas so that the embossed portions would show, then wiping off any excess color I didn't want.  I applied the Schoolhouse first over the entire piece. Then I added a little bit of denim until I was happy with the result.
I don't like having a solid edge from my stencils, so I always tape a piece of scrap paper on the edge so that it feathers off.
After I glued my paper down, I applied gesso through the stencil and let it dry. Once dry you can pile on the embellies to your hearts content!
How cute are those little buttons!!!!???? The mini roses are from the November Kit and I added a few more from my stash.  
  The sentiment was trimmed from the journal block sheet included in the kit.
I added some seam binding here as well.
 
 I wanted some dimension to the project so I used foam tape on several pieces.
 So there you have it- this is a really fun technique, that is not too messy!
Be sure to give it a try and let me know what you think.
May The Flamingos be with you :o)
Anita

4 Comments »