
Hi everyone, it's Anita here today
and I have another Deconstructed Layout to share with you!

Today we are going to talk about adding background texture to your layouts
using stencils, stamps, paste and colors.
Here is a look at my layout

Now, you know I like to have a lot of "stuff" on my layouts, but I
am really trying to make them more flat so I can get more than 10 in an album!
So I added a lot of texture to this layout without adding a lot of bulk.

Start out by stamping randomly on the page, I inked my stamp
with a Stampers Big Brush Pen in black, then misted it with water before stamping.
I only inked a small part of the stamp each time. You can see that the image is dependent on
how much water you mist onto the stamp, less water equals a cleaner impression, more
water equals a messier impression- totally up to you.

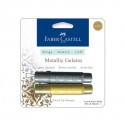
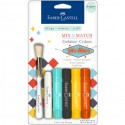
Next up, I cut a small slice off the end of my Gelato® stick and added water
(I normally use a craft mat, but here I was working on a large piece of clear plastic that my
die cut chipboard came in, you just can't see it in the photo)
Mix the Gelato and water into a thin, runny paste, and flick it onto the layout using
a stiff paint brush.
Next use a stencil and Modeling paste to add another layer.
I have no idea why I have no photo of this!

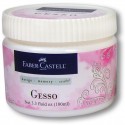
While your paper is drying, grab a large Die Cut Chipboard piece and apply a coat
of gesso. (I didn't apply the gesso on this cardstock, I just used the cardstock to get a better photo)

When I apply paint, gesso or whatever to a large piece, I always get a bunch on the bottom
of the piece, so I take the chipboard and put it onto a plain piece of cardstock- this will take
the excess gesso/paint off the bottom of the chipboard AND start another background page
I can use later.

I used a variety of mediums to color my chipboard when it was dry; markers, pencils, and Gelatos®.
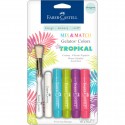
Rub a little bit of your Gelatos directly onto you work surface, mist it with water and combine to
form a workable paint. Using a paintbrush you can paint the smaller pieces. I used Gold Gelatos to paint the bows on the chipboard in this same manner.

Mix more Gelatos® with water- you want this one pretty runny

Use your ribbon to soak up the color- using this technique you can color your
ribbon any color you need to match your layout.

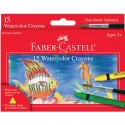
I used my Cameo to cut my title, then I added white accents. I also
used a Pastel Pencil to add more depth to the edges- a Watercolor Pencil will
work in the same manner for this technique.
Here are a couple of close ups of my layout

Here you can see the modeling paste I applied- when it was dry I used a sponge to apply
Gelatos® directly to the paste to give it a light color.

Thanks so much for making it to the end of the post today!
To see more details on this layout, check out my blog.

6 Comments »


6 Responses to “The Deconstructed Layout With Anita - Then and Now”
Wow - I am amazed at all the details on your layouts! Love seeing how you create your backgrounds!
Wow wow wow! This is gorgeous! LOVING the colors and those flowers!!!!
I love the way you break down the process and make it look so easy!! Thanks for sharing your tips with us!
Totally digging the different mediums you used to layer with!
Really love your deconstructed layout posts Anita! I am so scared of mixed media and you showing exactly how to use these techniques really helps!
Perfect! Great step by step instructions. I love the look of these types layouts but don't really know where to start. Thank you!
Post a Comment