
I am such a fan of flowers on my
paper crafting projects, I love to pile as many on as possible, but that
can get a little bit pricey so I love using handmade blooms!
Today I wanna share with you one of my most favorite handmade flowers, sure to add that special touch to any crafting project!!

SUPPLIES

flower punch (it does not need to be the same as mine, it just needs to be a 4 petal punch)
enough paper to punch 4 flowers
scissors
some kind of skinny stick (I use a paint brush end)
STEP 1

Punch out 4 flowers all the same size.
STEP 2

You will need to make your cuts in each flower
Flower #1 you will just cut a slit into the flower between 2 of the petals and stop in the center
Flower #2 you will need to cut a petal from your flower using a pie slice shape, also stopping in the center.
Flower
#3 you will repeat the same cut as flower #2 except this time when you
make your pie slice cut you need to remove 2 petals instead of just 1.
STEP 3

For
the last flower you will make a very different cut. Starting in between
2 petals cut into your flower just enough to leave enough room as to
not slice off petals when you start your spiral cut to the center. You
can make your spiral as many layers as you wish or as little. When you
are finished it should look similar to the one above.
STEP 4

Now
it's time to adhere your cut flowers #1-3. All you need to do is dab a
small bit of glue (fast drying works best) on the edge of the petal that
was cut and slightly overlap the other side of the cut petal back to
it, creating a cone shape.
STEP #5


Flower
#4 is adhered a bit different. For this step you will need your skinny
skinny (I used the end of a paint brush) and started at the opening of
the cut flowers and wrapped in around the brush end in a spiral motion
until I reached the end. I then put a dab of my fast drying glue on the
bottom of the spiral cut flower and pressed the flower down over it
holding firm for a few moments until it's dry.
STEP #6

When you have completed the above step you should have 4 flowers that look similar to these above.
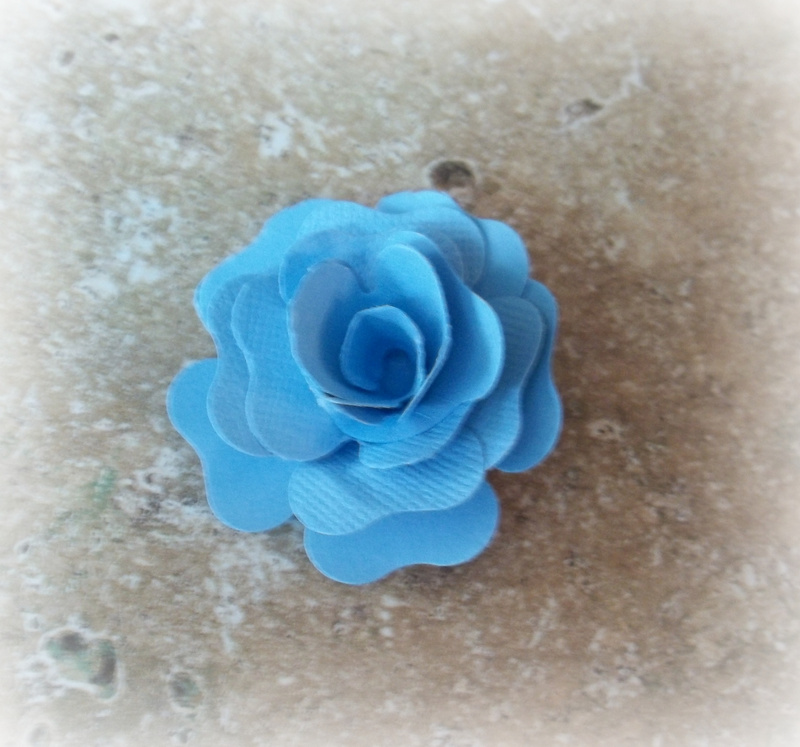
The final step is to assemble your 4 flowers to create 1 beautiful rose.
You
do this by adhering the each flower to the center of the other largest
to smallest. So adhere flower #2 in #1's center and so on and so forth.
When you are done your flower should look similar to the one below!
Thanks for taking a look, I hope you have enjoyed!!!
5 Comments »


5 Responses to “A Flower Tutorial by Jenifer!”
Great tutorial! I'd love to try that. Your flower looks so beautiful.
Love Outi
Looks fab...will have to give it a go...very clear tut, thank you:):)
AWESOME! love this idea, because yes those store bought flowers don't last forever, but you can get paper for so much cheaper, these would be pretty in a small print pattern paper too, thanks so much! now I need to find a four petal flower punch... :)
great tutorial - I love the 4th flower with the spiral - a nice twist !
Thank you for sharing the tutorials, I love to see how others do things and these flowers look great.
Post a Comment