
Fern
Hi everyone, Fern here and I'm going to show you how to make a cute "Desk Top Mini Album". Wouldn't this be a perfect gift for a teacher for Valentine's Day?!!
Hi everyone, Fern here and I'm going to show you how to make a cute "Desk Top Mini Album". Wouldn't this be a perfect gift for a teacher for Valentine's Day?!!
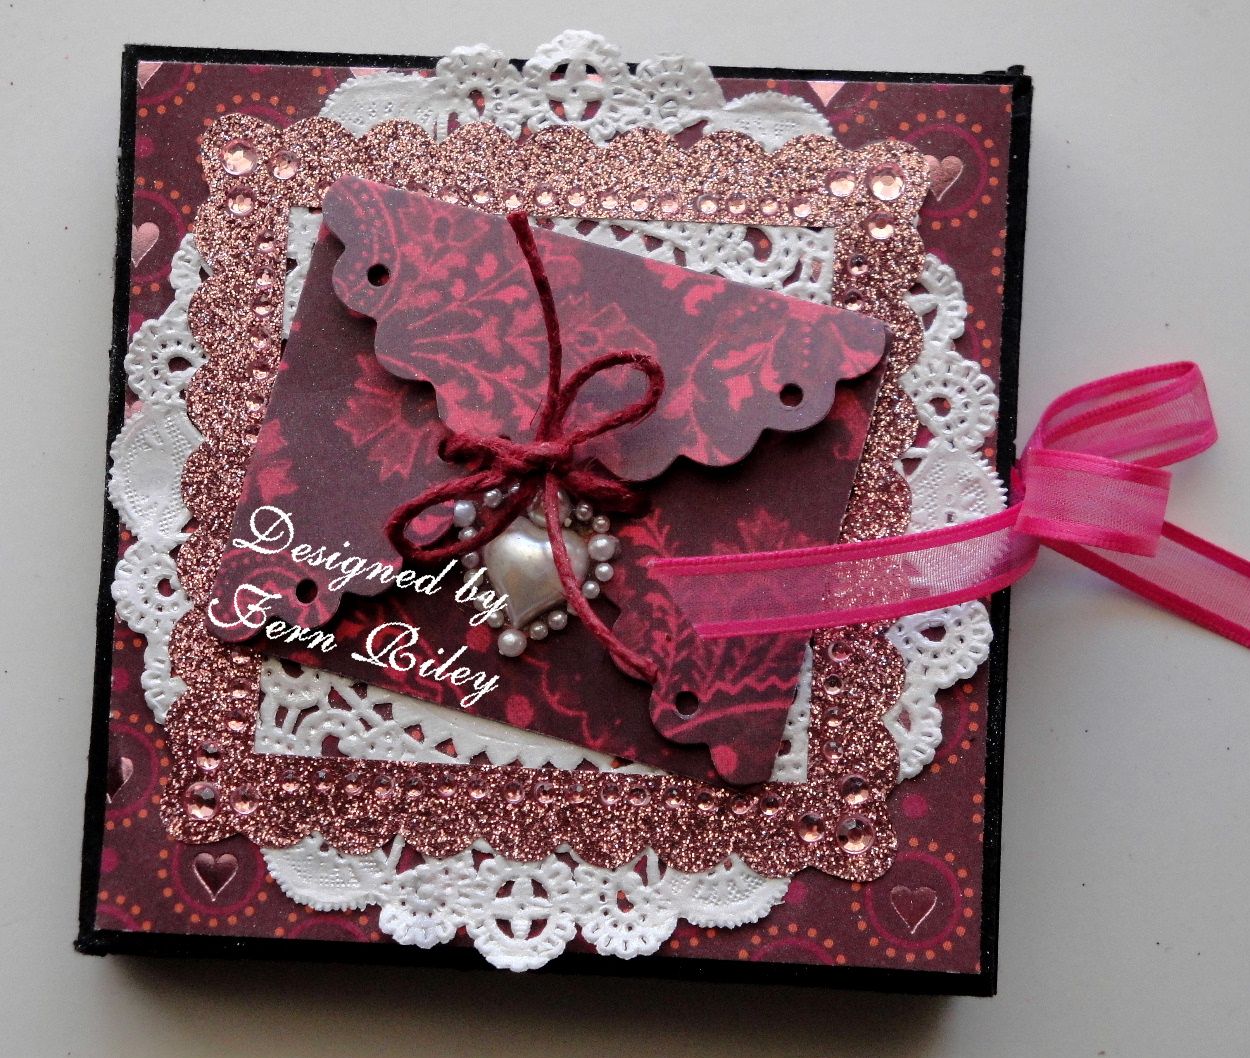
Here it is closed...
And here it is opened (top view)...

Opened (side view)...

Here is what you're going to need...

4 pieces of paper/cardstock.. I used SU Basic Black CS
Paper cutter
Bone folder
Tape Runner
2 pieces of 10" Ribbon
Decorative Paper
And a little "Bling" of your choice to decorate the front cover
Cut (4) - 8" by 8" pieces of paper/cardstock
1) Fold it in half.. Use bone folder..

2) Unfold.. turn the page and fold it in half again... Use bone folder

3) Unfold, and now fold the page from tip to tip and make a triangle... Use bone folder

4) Unfold, and now do the opposite tip to tip and make another triangle.. Use bone folder.

Unfold and turn over... This is what it should look like..

Now you are going to do steps 1 thru 4 again on this side.. and don't forget to use your bone folder..
It should look like this..

Now you are going to take the upper left square and "pinch" it together, while the rest of the paper comes forward/up. Sometimes it wants to go down and that is not correct...

You should have a little triangle and a 3 sided square...

Now you want to open the little triangle up and go ahead and run your tape runner on the underneath side and press tight..

Now here's what you should have...

And I do apologize for doing this in black... It's a little hard to see, but you do have the 3 sides and a little triangle here..
Now this is all you're going to do with this for the time being... Now you need to do the other 3 pieces of paper/cardstock the same way....
This is what you should have when you're finished...

Now it's time to start adding your pretty papers!!! I find it's a lot easier to decorate each box before you attach them together.. Each square should be 4" x 4", so be sure and cut your pp a little smaller...

First I add the paper on the triangle side... It's a lot easier to do this before you tape down the outside edge of the triangle.. Now you can tape the triangle down along the outside edge... You should have a pocket for a tag...

Next you are going to do the bottom... You will have to do this in 2 pieces so it can fold up when you close your album..

Here's my first box decorated...

Here's the second box... You can now put these 2 together.. You should attach a plain "photo" side with a tag side...


Here I have 3 boxes put together.. Notice how I added the ribbon under the pp under the tag side..

Here you can get an idea of how it folds up... I still have to add the 4th "box"..

Here is the final box... Notice that I've added another piece of ribbon under the pp on the photo side this time.. Do NOT tape the last box to the first box... This is so you can close your album..

Here is a top view of this album.

Here is a closed view before it's decorated...

I covered the front and back with this pp..

And again, my finished album!
You can't add a lot of bulk to these little albums, but you can add stickers, doilies, lace and a little bling...
I hope you enjoyed reading through my tutorial and that just maybe you will want to give it a try. They make wonderful gifts!!
Thanks for stopping by!!
Have a great day!!
Fern
6 Comments »


6 Responses to “Show Me Sunday - A Tutorial by Fern!”
Thanks for the sharing!! I loved.
Val
www.crieartezzanato.blogspot.com
This is great!! My mom works at a desk this would be perfect for pictures of her granddaughter!!
Michelle
scrappinforkenzie.blogspot.com
Hello Fern
Super Beautiful creation, thanks for the wonderful tutorial. Love it!
-Sony
Hi Fern, this is so stunning! This great tutorial really did make me want to give it a try, my first non card creation!!! I was so impressed with the instructions and how easy it was to follow them.
I have created my own mini album for my DT work and have given credit to you and provided a link back here. From the comments so far a lot of people are going to be popping by for your tutorial.
Thanks a bunch!!!
Hugs,
Linda xx
I love it !!
I show it at 2010 on my blog, I love it...
http://pattyskreativseite.blogspot.de/2010/04/4-zimmerkarte-asia-fur-dich.html
greetings from germany, patty
Post a Comment